Carriage bolts are a distinctive type of fastener with a round, domed head and a square neck that prevents rotation during installation. Originally designed for use in wooden applications, they have expanded into a variety of materials and industries thanks to their durability and versatility. This article explores what carriage bolts are, how they work, and the most common applications for which they are ideally suited.
1. Understanding Carriage Bolts
Carriage bolts feature a smooth, rounded head with no slots or ridges. Directly beneath the head, a square section bites into the material, preventing the bolt from turning when a nut is tightened onto it. Typically, carriage bolts are installed with the head facing outward, creating a neat, tamper-resistant finish. This makes them especially valuable in projects where aesthetics and safety are priorities.
2. How Carriage Bolts Work
Carriage bolts function by inserting the bolt through a pre-drilled hole, allowing the square neck to engage with the material. Once a nut is applied to the threaded end, it is tightened with a wrench or spanner, drawing the materials together. The unique design prevents the bolt from rotating, providing a secure, long-lasting bond even in demanding environments.
3. Key Applications of Carriage Bolts
Carriage bolts are used in a broad range of applications. Here’s a look at some of the most common uses:
A. Woodworking and Furniture Assembly
Carriage bolts are commonly used in woodworking and furniture projects due to their secure, tamper-resistant design. The smooth, rounded head makes them ideal for surfaces that will be touched or leaned against, ensuring comfort and safety. Examples include:
Assembling outdoor decks and benches
Constructing playground equipment
Securing wooden structures, such as fences and gates
B. Automotive and Construction Industries
In automotive and construction settings, carriage bolts are valued for their strength and reliability. They are used in:
Securing wooden components in trailers and flatbeds
Fixing parts in construction frameworks where aesthetics and durability are needed
Reinforcing wooden panels or boards that may face heavy wear and tear
C. Metalworking and Heavy Equipment
Although carriage bolts are traditionally associated with wood, they are also used in metal applications, particularly when paired with specialized washers. The square neck of the bolt provides stability and prevents movement in metal-to-metal connections, which is useful for:
Securing metal sheeting or panels
Attaching machinery parts in equipment that experiences vibration
Reinforcing structures where shear strength is necessary
D. Home Improvement Projects
Carriage bolts are popular in home improvement and DIY projects due to their ease of use and strong, secure connection. Common household applications include:
Fixing wooden or metal doors
Creating garden structures, such as pergolas and arbors
Building custom furniture pieces, like beds or cabinets
E. Marine and Outdoor Structures
Carriage bolts, especially when made of stainless steel or coated in corrosion-resistant materials, are well-suited for outdoor and marine environments where exposure to moisture and weather is constant. Common uses in this category include:
Securing dock structures and boat fittings
Assembling outdoor recreational structures, like picnic tables and beach benches
Constructing sheds, pergolas, or outdoor storage units
4. Why Choose Carriage Bolts?
Carriage bolts have distinct benefits that make them a popular choice across different applications:
Tamper Resistance: With a rounded head and lack of slots, carriage bolts are difficult to remove without specialized tools, adding a level of security.
Aesthetic Appeal: The smooth, rounded head gives a clean look, especially important in furniture and visible structural applications.
Ease of Installation: Thanks to the square neck, carriage bolts require minimal effort to keep in place while tightening, especially in wood.
Strength and Durability: Made from high-quality materials like stainless steel, carriage bolts can withstand high loads and environmental stresses.
5. Types of Carriage Bolts
Carriage bolts come in several materials and finishes to suit different applications:
Stainless Steel: Provides excellent corrosion resistance for outdoor and marine use.
Zinc-Plated Steel: Ideal for indoor use, offering moderate corrosion resistance.
Galvanized Steel: Galvanized carriage bolts are suitable for outdoor projects, with a corrosion-resistant coating.
Black Oxide Coated: Offers a more aesthetic finish for furniture and visible applications.
6. Installation Tips for Carriage Bolts
Drill the Hole Slightly Smaller Than the Square Neck: This ensures a snug fit that prevents the bolt from turning during installation.
Use a Hammer to Tap the Bolt in Place (If Needed): Especially in dense wood, gently tapping the bolt will help secure the square neck in the material.
Apply a Washer for a Tightened Fit: A washer helps distribute pressure and prevent damage to the material.
Have you ever wondered how scientists measure a fluid’s thickness or its resistance to flow? Viscosity is a critical property in many industries, impacting product quality, process efficiency, and even consumer satisfaction. To accurately measure viscosity, viscometers play an essential role. Among the various viscometry methods, digital rotational viscometers are particularly valued for their precision, efficiency, and user-friendliness. This article explores the fundamentals and benefits of digital rotational viscometry, why it’s preferred across industries, and how it operates.
What is Viscosity?
Viscosity represents a fluid’s resistance to flow. High-viscosity fluids, like honey or molasses, flow slowly, while low-viscosity fluids, such as water, flow easily. Understanding viscosity is vital across industries—from pharmaceuticals to food processing—since it influences everything from manufacturing processes to product consistency.
Traditional Methods in Viscometry
Capillary Viscometry: Measures fluid flow through a narrow tube. However, its sensitivity to temperature changes limits its effectiveness.
Rotational Viscometry: Relies on a rotating spindle in a fluid but requires manual operation, which can reduce accuracy.
Falling Ball Viscometry: Determines viscosity by observing how fast a ball falls through the fluid, though it is limited to transparent fluids and can suffer from turbulence errors.
Vibrational Viscometry: Involves damping oscillations in a vibrating probe. However, this method requires precise calibration and may be influenced by external vibrations.
While these methods have their advantages, they often fall short in accuracy, versatility, and ease of use. Digital rotational viscometers address these limitations with automated operation, real-time data analysis, and higher precision.
Precision and Accuracy: Automated operation reduces human error, providing reliable data for research, quality control, and process optimization.
Efficiency and Automation: Automated functions streamline the measurement process, allowing users to set parameters, initiate measurements, and obtain results quickly.
Versatility: Digital rotational viscometers handle a broad range of viscosities and can analyze both Newtonian and non-Newtonian fluids, making them versatile for various industries.
Real-Time Data Analysis: Built-in software enables real-time monitoring of viscosity changes, helping users analyze trends and make prompt decisions.
Cost-Effectiveness: While the initial cost may be higher, the long-term savings in maintenance and reduced manual labor make these viscometers a cost-efficient solution.
Compliance with Standards: These instruments often meet industry standards, simplifying regulatory audits and supporting consistent product quality.
Components of a Digital Rotational Viscometer System
Rotating Spindle: Applies shear stress to the fluid, with spindle types varying based on sample characteristics.
Torque Sensor: Measures the torque exerted by the fluid, which is crucial for determining viscosity.
Drive System: Controls the spindle’s rotation speed, allowing precise adjustments for different sample viscosities.
Temperature Control: Maintains a stable temperature for accurate readings, as viscosity can vary with temperature changes.
Display and Interface: Allows users to set parameters, initiate measurements, and visualize data.
Software: Enables data analysis, plotting of viscosity curves, and easy data export.
Sample Chamber: Holds the fluid sample and accommodates different spindles for varied viscosities.
Optional Accessories: Enhance functionality with items like temperature probes and sample holders.
Together, these components enable precise and efficient viscosity measurements, making digital rotational viscometers invaluable for both industrial and scientific applications.
How Digital Rotational Viscometers Operate
Digital rotational viscometers function based on the principles of shear stress, shear rate, and viscosity measurement:
Shear Stress and Shear Rate: Shear stress is the force exerted on a fluid, while shear rate is how fast the fluid layers move relative to each other.
Viscosity Measurement: The torque sensor quantifies resistance as the spindle rotates within the sample, which corresponds to the fluid’s viscosity.
Newton’s Law of Viscosity: This law states that shear stress is directly proportional to the product of viscosity and shear rate.
Calibration and Conversion: Calibration with standard fluids enables the viscometer to convert torque readings into viscosity values accurately.
Real-Time Analysis: With digital displays and software, users can monitor and analyze viscosity in real-time, enhancing process control.
By adhering to these principles, digital rotational viscometers deliver highly accurate and consistent viscosity data, essential for many applications.
Read the Manual: Familiarize yourself with the manufacturer’s instructions and safety guidelines.
Personal Protective Equipment (PPE): Use goggles and gloves to prevent contact with potentially hazardous samples.
Proper Setup: Place the viscometer on a stable surface and ensure all connections are secure.
Sample Handling: Avoid overfilling to prevent spillage and potential contamination.
Temperature Control: Follow temperature guidelines to avoid measurement errors and protect equipment.
Spindle Installation and Removal: Handle carefully to avoid misalignment or equipment damage.
Power Safety: Only use the specified power sources and avoid damaged cords.
Cleaning and Maintenance: Regular cleaning prevents sample buildup and ensures measurement accuracy.
Emergency Procedures: Know the location of emergency shut-off buttons and have spill cleanup materials on hand.
Training and Supervision: Ensure operators are trained in safe handling, operation, and maintenance.
Following these safety protocols minimizes risk and ensures optimal performance when using digital rotational viscometers.
Digital rotational viscometers represent a substantial advancement in viscosity measurement, combining accuracy, efficiency, and versatility. By using the principles of shear stress and shear rate, these tools deliver real-time data for diverse industries. With their automated features and reliable performance, digital rotational viscometers are essential for applications in research, development, and quality control. For those looking for high-quality digital rotational viscometers, Drawell provides a trusted range of lab equipment to meet your needs.
Offshore oil rig decommissioning is a complex, multi-step process that involves dismantling, removing, and managing the environmental impact of aging oil and gas platforms. As more offshore rigs reach the end of their production life, decommissioning has become a vital part of the oil and gas industry. Executing these projects effectively requires a well-coordinated approach to manage environmental, financial, and operational aspects. Here’s a guide on how to excel in offshore oil rig decommissioning, from planning to safe disposal.
Before beginning the decommissioning process, it’s essential to carry out a thorough assessment of the rig and the surrounding environment. This involves:
Engineering Surveys: Detailed structural and engineering surveys identify the rig’s condition and any modifications made over its lifetime.
Environmental Impact Assessment (EIA): The EIA identifies sensitive habitats, marine life, and protected areas around the rig. This assessment helps design an environmentally responsible approach and reduce ecological impact.
Risk Assessment: Evaluate the risks associated with the decommissioning, including potential hazards to workers and the environment. Assessing risks enables the development of contingency plans and safety measures.
By conducting these assessments, you lay the groundwork for a smoother and safer decommissioning project.
2. Develop a Clear and Detailed Decommissioning Plan
A well-defined decommissioning plan is crucial to coordinate various stages, minimize risks, and control costs. This plan should include:
Project Timeline and Phases: Define clear stages such as plug and abandonment of wells, topside removal, and site clearance.
Budget and Financial Planning: Outline expected costs, including contingencies for unexpected expenses.
Compliance Strategy: Address regulatory requirements from relevant authorities, including permits, documentation, and compliance with national and international regulations.
A clear decommissioning plan keeps the project on track, meets legal obligations, and helps prevent delays and cost overruns.
3. Prioritize Safety in Plugging and Abandonment of Wells
The first technical step in decommissioning is plugging and abandoning (P&A) wells. This process requires specialized equipment and expertise to permanently seal the wells, minimizing future environmental risks. Key steps in well P&A include:
Clearing Residual Hydrocarbons: Ensure that the well is cleared of any residual oil or gas.
Installing Cement Plugs: Place cement plugs at strategic points to prevent fluid migration, as required by regulatory standards.
Pressure Testing: Conduct pressure testing to verify that the cement seals are secure and effective.
Since well P&A is complex and potentially hazardous, strict adherence to safety protocols and advanced training for personnel are critical to prevent accidents and leaks.
4. Choose the Right Decommissioning Method
Selecting an appropriate method for dismantling the rig is essential to minimize environmental impact and adhere to regulations. The primary methods include:
Full Removal: Involves complete dismantling and removal of the rig, including the jacket, topside, and substructures. Full removal is often the preferred method to restore the site to its original state.
Partial Removal: Some portions of the structure, particularly those below the seabed, are left in place, which can minimize costs and provide artificial reefs for marine life.
Rig-to-Reef Conversion: The structure is repurposed as an artificial reef to support marine ecosystems, which may be viable in some locations depending on environmental and regulatory considerations.
Careful evaluation of these options helps balance costs, ecological impact, and regulatory compliance, ensuring the best outcome for each specific project.
5. Implement an Environmentally Responsible Dismantling Process
Environmental stewardship is crucial in decommissioning. An environmentally responsible approach includes:
Waste Management: Develop a comprehensive plan for waste disposal, recycling, and repurposing materials, such as metals, plastics, and hazardous substances.
Marine Life Protection: Schedule decommissioning activities to avoid critical periods for local marine life, like breeding seasons, and consider the use of noise reduction technologies to protect marine mammals.
Pollution Prevention: Implement strict procedures to prevent accidental spills or leaks, including secondary containment for fuels and chemicals and regular monitoring of water quality.
Following best practices in environmental management minimizes ecological damage, aligning decommissioning activities with sustainable practices.
6. Use Advanced Technology for Dismantling and Site Clearance
Deploying advanced technology and equipment can increase the efficiency and safety of the decommissioning process. This includes:
Remote-Controlled Underwater Vehicles (ROVs): ROVs are invaluable for underwater inspections, cutting, and removing subsea structures. They reduce risks for divers and improve precision in dismantling.
Specialized Cutting Tools: Utilize diamond wire and abrasive waterjet cutters to dismantle metal structures efficiently while minimizing environmental impact.
Site Clearance and Survey Tools: Conduct post-decommissioning surveys to ensure that all debris and structures have been removed or are in compliance with site clearance standards.
Using advanced technologies reduces risks and ensures thorough site clearance, helping meet regulatory and safety standards.
7. Engage Stakeholders and Communicate Transparently
Successful decommissioning requires coordination with multiple stakeholders, including regulatory bodies, environmental organizations, and the public. Transparent communication fosters trust and ensures that all parties are informed of the project’s progress. Key strategies include:
Regular Reporting: Provide updates to stakeholders at key project milestones, including environmental impact mitigation efforts and compliance with regulations.
Stakeholder Consultation: Engage with local communities, environmental groups, and regulatory authorities early in the process to address concerns and gather input.
Public Transparency: Share decommissioning plans, environmental reports, and post-decommissioning monitoring data with the public to build trust and demonstrate commitment to environmental protection.
Effective communication with stakeholders reduces potential conflicts and supports smooth project execution.
8. Post-Decommissioning Monitoring and Site Restoration
Once the rig is dismantled, ongoing monitoring and restoration are essential to ensure the area is returned to a safe, stable state. Steps for post-decommissioning include:
Environmental Monitoring: Conduct regular environmental assessments to ensure no residual contamination or damage to marine ecosystems.
Seabed Restoration: If necessary, restore the seabed to encourage the recovery of marine habitats and prevent erosion.
Final Compliance Check: Complete all required documentation, and report compliance with decommissioning regulations and environmental standards to relevant authorities.
These measures confirm that the decommissioning process has met environmental and safety standards, contributing to sustainable offshore management.
How Simulation Technology is Used in Offshore Oil Rig Decommissioning
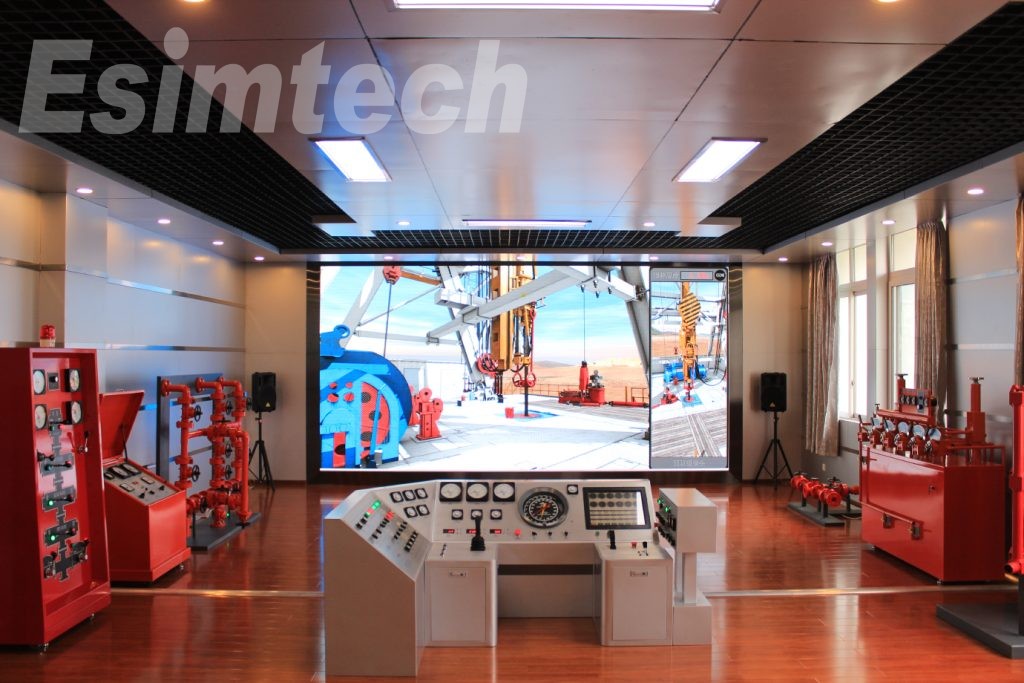
Simulation technology plays a vital role in offshore oil rig decommissioning, offering a virtual platform to model, test, and refine various aspects of the process. By simulating different stages, the oil and gas simulation tools enhance planning, safety, training, and operational efficiency in decommissioning projects. Here’s an overview of how simulation technology supports each stage of offshore oil rig decommissioning:
1. Rig Design and Planning
Virtual Prototyping: During initial planning, engineers create virtual models of the rig and its components. This enables them to test multiple decommissioning scenarios and optimize dismantling and removal strategies.
Structural Integrity Testing: Simulations assess the rig’s structural integrity, helping engineers understand load-bearing capacities and identify potential challenges before dismantling begins.
2. Buoyancy and Stability Analysis
Hydrodynamic Simulation: Modeling how the rig maintains buoyancy and stability under varying sea conditions is essential. Hydrodynamic simulations allow engineers to examine the interaction between the rig’s structure, ballast systems, and ocean environment to ensure stability throughout decommissioning.
3. Drilling Processes
Drilling Simulations: For rigs with operational wells, simulations help optimize well plugging and abandonment. Simulating processes like plug insertion and cementing improves safety and ensures wells are securely sealed to prevent environmental hazards.
4. Dynamic Responses
Environmental Force Simulation: External forces, such as waves, wind, and currents, impact the rig’s stability. Simulations help predict the rig’s response to these dynamic elements, allowing engineers to plan accordingly to maintain stability during decommissioning.
5. Emergency Scenarios
Emergency Response Training: Simulation technology trains personnel for emergency situations, like blowouts or fires. Virtual scenarios allow crew members to practice evacuation procedures, well control, and other critical safety measures in a controlled environment.
6. Crew Training
Virtual Reality (VR) Simulations: Advanced VR simulations offer realistic training for rig personnel. Crew members can familiarize themselves with decommissioning operations, equipment, and safety procedures, gaining valuable hands-on experience before working on-site.
7. Equipment Testing
Machinery Performance Simulation: Decommissioning involves various machinery, including cranes and specialized dismantling equipment. Simulations test equipment performance, allowing engineers to optimize machinery configurations and identify potential issues proactively.
8. Data Integration
Real-Time Data Feeds: By integrating real-time data from operational rigs, simulation platforms allow operators to make informed decisions. This data-driven approach improves responsiveness to changing conditions and enhances situational awareness.
9. Optimization and Efficiency
Scenario Analysis: Simulation technology enables engineers to analyze different decommissioning scenarios, helping identify strategies to improve operational efficiency. Engineers can evaluate approaches to dismantling, waste disposal, and resource allocation.
10. Risk Mitigation
Risk Assessment Simulations: Simulations provide a safe platform to assess risks associated with decommissioning. By testing scenarios in a virtual environment, operators can identify potential hazards and develop strategies to enhance safety and minimize risks.
11. Research and Development
Testing New Technologies: Simulation accelerates the research and development of new technologies, equipment, and procedures. Virtual testing enables engineers to refine innovative solutions before they’re implemented on actual rigs, reducing the risk associated with new technology deployment.
Excelling in offshore oil rig decommissioning requires meticulous planning, cutting-edge technology, and a strong commitment to safety and environmental responsibility. By focusing on comprehensive pre-assessments, detailed planning, well abandonment, environmentally conscious dismantling, advanced technology, stakeholder engagement, and post-decommissioning monitoring, companies can ensure that offshore decommissioning projects are successful, safe, and sustainable. With the growing importance of decommissioning in the oil and gas industry, following these best practices is key to minimizing impact and maximizing operational excellence in offshore projects.
Advanced new materials, recognized for their unique properties—such as high strength-to-weight ratios, enhanced thermal stability, and exceptional flexibility—bring new challenges to manufacturing and processing. Among these challenges, tension control stands out as essential to ensure the quality, reliability, and performance of products derived from these materials.
Understanding Tension Control in Material Processing
Preventing defects, such as wrinkling, stretching, or breakage
Achieving the desired mechanical and physical properties in the final product
While tension control in traditional materials like steel or conventional polymers is relatively straightforward due to their predictable behavior under stress, advanced new materials—such as carbon-fiber composites, shape-memory alloys, and high-performance polymers—require novel approaches to handle their complex behaviors.
Challenges in Tension Control for Advanced New Materials
Material Heterogeneity and Anisotropy
Definition: Advanced materials, like carbon-fiber composites, are often heterogeneous (non-uniform) and anisotropic (properties vary by direction).
Challenge: Traditional systems are designed for isotropic materials, where properties are uniform in all directions. Anisotropy in advanced materials calls for customized tension control that accounts for varying strengths along different axes.
Sensitivity to Environmental Conditions
Definition: Many advanced materials are highly sensitive to factors like temperature, humidity, and chemical exposure.
Challenge: For instance, shape-memory alloys alter mechanical properties with temperature fluctuations. This sensitivity necessitates real-time tension adjustments, as environmental changes can significantly affect the material’s behavior under stress.
Nonlinear Stress-Strain Behavior
Definition: Advanced materials often display nonlinear and time-dependent behaviors, such as viscoelasticity or plasticity, rather than the linear stress-strain behavior of traditional materials.
Challenge: This nonlinearity complicates tension control, requiring sophisticated models and systems to predict and manage the material’s response under varying stress conditions.
High Precision Requirements
Definition: Advanced materials are commonly used in applications that demand high precision, such as aerospace, medical devices, and electronics.
Challenge: Even slight deviations in tension can lead to defects like micro-cracks or delamination, which compromise product functionality and safety. Ensuring the necessary precision in tension control requires advanced systems capable of tight tolerances.
Complex Manufacturing Processes
Definition: Processing advanced materials often involves multi-stage techniques, such as layering, resin infusion, or high-temperature curing.
Challenge: Each manufacturing stage has unique tension control requirements. For example, during composite production, tension must be managed across fiber placement, resin application, and curing to prevent defects.
Dynamic Material Behavior
Definition: Some advanced materials exhibit dynamic behavior, where properties change during processing due to phase changes or chemical reactions.
Challenge: Managing tension for materials that undergo state changes requires real-time monitoring and adaptive control systems to respond to these transitions without causing damage.
These challenges underscore the need for advanced tension control systems tailored to the unique properties and processing requirements of new materials.
Solutions and Innovations in Tension Control for Advanced New Materials
Advanced Tension Control Systems
Solution: Leveraging real-time sensors, automated feedback loops, and machine learning, modern tension control systems precisely regulate tensile forces during processing.
Innovation: These systems dynamically adjust tension based on real-time data, adapting to changes in material properties, environmental conditions, and processing speeds for consistent quality.
Adaptive and Predictive Control
Solution: Adaptive control modifies operation in response to material behavior, while predictive control uses advanced modeling to anticipate changes.
Innovation: Predictive algorithms forecast material reactions to tension, enabling preemptive adjustments, especially beneficial for managing nonlinear, time-dependent behaviors seen in viscoelastic or shape-memory materials.
Integrated Process Control
Solution: Integrating tension control with other parameters, like temperature and speed, offers a holistic approach to material processing.
Innovation: In complex processes like composite manufacturing, synchronizing tension control with factors such as resin flow rates reduces risks of defects like delamination.
Material-Specific Control Strategies
Solution: Developing tailored strategies enhances processing outcomes for materials with unique characteristics.
Innovation: For anisotropic materials, control systems apply direction-specific tensions, preserving material properties. Custom algorithms can also account for stress-strain curves, providing precise control.
Real-Time Monitoring and Feedback
Solution: Real-time monitoring systems continuously measure material tension, offering immediate feedback for control adjustments.
Innovation: High-resolution sensors and data analytics allow instant corrections, maintaining the tight tolerances required for critical applications like aerospace or medical devices.
Smart Materials and Self-Regulating Systems
Solution: Developing smart materials that can self-regulate tension or provide stress feedback is an emerging area.
Innovation: Some materials incorporate embedded sensors or actuators to adjust tension automatically. For instance, composites with piezoelectric elements can modify tension in real-time, reducing dependency on external control systems.
Simulation and Digital Twins
Solution: Simulation tools and digital twins model and predict tension scenarios before production.
Innovation: Digital twins create virtual replicas of materials and processing environments, allowing risk-free testing and optimization of tension strategies for efficient, accurate production runs.
Creating a custom My Little Pony custom plush can be a fun and rewarding project for fans of all ages! Whether you’re crafting a plush of a classic character or designing a new pony from scratch, the following guide will help you turn your ideas into a soft, cuddly, and colorful plush.
1. Gather Your Materials
To start, you’ll need the following materials and tools:
Pattern: Look for a My Little Pony plush pattern online or draw your own. Patterns can be purchased or found free on various crafting websites. Many patterns come with instructions for cutting and sewing.
Fabric: Select a soft fabric like fleece, minky, or felt in the colors needed for your pony. Minky fabric, while slightly more challenging to sew, offers a luxurious, soft feel ideal for custom plush toys.
Thread: Choose thread colors that match your fabric to ensure seams blend in seamlessly.
Polyester Stuffing: This is the fluffy filling that gives your plush its shape. Polyester fiberfill or cotton batting are commonly used.
Scissors, Pins, and Sewing Needles: For cutting and assembling your pieces.
Sewing Machine (optional): A machine can help with quicker stitching, but you can sew by hand if preferred.
Markers or Embroidery Supplies: For adding facial features, cutie marks, and other small details.
2. Choose Your Character and Design
If you’re recreating a well-known character like Twilight Sparkle or Rainbow Dash, find reference images to match colors, hairstyle, and details accurately. If creating an original character, sketch out your pony to decide on colors, hair style, eye shape, and any distinguishing features, like a unique cutie mark.
3. Prepare the Pattern and Fabric
Cut Out the Pattern Pieces: Follow the pattern’s instructions, cutting out each piece precisely.
Trace Onto Fabric: Use your pattern pieces to trace onto the fabric, making sure to flip any pieces that need to be mirrored (like legs or ears).
Cut the Fabric Pieces: Carefully cut each piece out, being mindful to leave extra fabric for seams if the pattern specifies.
4. Sewing the Main Body
Begin with the Legs and Body: Start by stitching the legs, arms, and body as indicated by the pattern. Sew pieces inside out, leaving a small opening to turn the fabric right-side out.
Attach the Head: Sew the head pieces together and then attach it to the body. This may be the trickiest part, so use pins to hold the fabric in place as you sew.
Turn and Stuff: Turn the sewn pieces right-side out and begin stuffing them with polyester filling. Aim for an even, plush feel but avoid overstuffing, which can make seams pop open.
5. Adding the Mane, Tail, and Ears
Mane and Tail: Cut the fabric for the mane and tail based on the character design. Sew or glue these parts onto the head and rear of the plush.
Ears: Sew the ears to the top of the head, matching the colors and positioning according to your reference images.
6. Details: Face, Cutie Mark, and Accessories
Face: Sew or embroider the eyes and mouth. For characters with detailed eyes, consider using fabric markers or fabric paint to achieve the right look.
Cutie Mark: Draw, embroider, or sew on the cutie mark. Some choose to use iron-on fabric transfers for highly detailed designs.
Accessories: If your pony has any accessories (like glasses, a crown, or wings), sew these on or secure them with fabric glue.
7. Final Assembly and Quality Check
Once all parts are attached, give your plush a final check. Ensure all seams are secure, and make any final adjustments.
Lightly brush the plush with a soft-bristled brush if using minky fabric to fluff up the fibers.
8. Personalize Your Pony!
Add any additional finishing touches to personalize your custom My Little Pony plush further. This might include sparkles, small sewn-in jewelry, or a felt scarf.
By following these steps, you’ll have a custom My Little Pony plush that’s unique, adorable, and perfect for fans of the series. Crafting a custom plush can be a time-intensive process, but with patience and a creative eye, you’ll have a wonderful handmade pony to treasure or gift.
A panhead screw is highly valued in the fastener industry for its versatility and user-friendly design. Whether you’re a DIY hobbyist, a handyman, or a construction professional, understanding the unique qualities and uses of a panhead screw can help you choose the right fastener for your needs. This article will delve into what makes a panhead screw distinct, highlighting its design, key benefits, and popular applications.
Basic Overview of a Panhead Screw
A panhead screw features a slightly convex, rounded head that resembles a shallow pan, giving it its distinctive name. It typically comes in Phillips (often referred to as a “pan head Phillips screw”) or slotted drive options, with other varieties like Torx or square drive types also available, known as “pan head torx screws“
Features and Advantages of a Panhead Screw
Head Design
The rounded, slightly convex head of a panhead screw provides a broader surface area, enabling even force distribution and preventing it from sinking too deeply into the material. This design supports flush or slightly raised installation depending on countersink depth, making it suitable for various projects.
Versatility Across Applications
Known for adaptability, panhead screws are commonly used in woodworking, furniture assembly, electrical installations, and metalworking. They provide secure fastening in any application requiring a reliable, durable solution.
Easy Installation
Designed for convenience, the panhead screw’s broader head allows easy installation with a standard screwdriver or power drill. The larger surface provides a better grip, reducing slippage during installation, which is beneficial for DIY projects and professional work.
Secure Fastening
Panhead screws offer high holding power due to their wide head, which enhances surface contact and ensures even force distribution. This feature reduces the risk of pull-out or material damage, creating a more reliable connection.
Resistance to Stripping
Screws with Phillips or Torx drivers, common in panhead designs, are less likely to strip compared to slotted types. Panhead philip machine screws driving in allows better torque transfer and minimize the chance of the screwdriver slipping.
Aesthetic Appeal
With their rounded, low-profile heads, panhead screws often provide a clean, visually pleasing finish. When installed properly, they blend smoothly with surrounding materials, enhancing the project’s appearance.
Variety in Size and Material
Panhead screws are available in various sizes and materials, including stainless steel, brass, and zinc-plated steel, allowing selection based on specific project requirements such as corrosion resistance, strength, and aesthetics.
Countersink Compatibility
Panhead screws work well with countersinking, a technique used to create a recess for the screw head to sit flush or slightly below the material’s surface. This helps achieve a polished appearance and prevents the head from protruding.
Common Applications of a Panhead Screw
Woodworking
Widely used in cabinetry, furniture assembly, and general joinery, panhead screws offer strong attachments and minimize the risk of wood splitting.
Electrical Fixtures
Ideal for mounting electrical plates, outlets, and light fixtures, panhead screws provide stability and prevent plates from loosening over time.
Metal Fabrication
Used for securing metal sheets or components, panhead screws distribute load evenly, reducing the likelihood of deforming or damaging metal surfaces.
General Construction
Common in various construction tasks like drywall installation, door hinge fixing, and hardware attachment, panhead screws are dependable and robust fasteners for building projects.
In summary, panhead screws are versatile, durable fasteners suited for a wide range of applications. Their rounded, broad heads offer secure attachments while distributing force evenly across surfaces, making them a reliable choice for woodworking, electrical setups, and construction tasks. By understanding their features and applications, you can select the ideal panhead screw for any project, ensuring professional, lasting results.
X-ray diffraction (XRD) is an essential analytical technique for characterizing material structure and composition. However, the precision and reliability of XRD measurements rely significantly on meticulous sample preparation. This article discusses best practices for preparing various sample forms for XRD analysis to ensure optimal results.
Homogeneity: Achieving sample uniformity is crucial for accurate XRD data. Non-homogeneous samples can lead to inaccurate diffraction patterns, potentially resulting in incorrect conclusions. Using proper grinding, mixing, and blending methods can help ensure uniformity throughout the sample.
Minimizing Surface Effects: Surface properties, like roughness and preferred orientation, can impact XRD results by distorting peak positions and intensities. Surface polishing can mitigate these effects, leading to clearer, more accurate data.
Avoiding Contamination: External contamination introduces unwanted peaks and affects sample analysis. Handling samples in a clean, controlled environment and regularly cleaning equipment can reduce contamination risks.
Sample Handling Techniques: Maintaining sample integrity is essential during preparation. Gentle handling methods, such as mild grinding and careful mounting, prevent mechanical stress or damage, preserving sample quality.
By following these general guidelines, researchers can enhance XRD sample quality, ultimately improving measurement reliability.
Best Practices for XRD Sample Preparation Across Different Forms
For powder samples, the following steps help ensure accurate XRD data:
Grinding and Crushing: Fine grinding into a homogenous powder is crucial for XRD analysis. Mortar and pestle or ball mills can achieve fine particle sizes, typically in the micrometer range.
Homogenization: After grinding, further homogenization may be needed. Techniques like mixing or sieving can ensure uniform particle distribution, minimizing heterogeneity effects.
Mounting: Properly mounting the powder sample onto a holder using suitable adhesives ensures even coverage and stability during measurement.
Surface Smoothing: Flattening the powder surface through light tapping or compressing can reduce irregularities, improving data quality. Excessive compaction, however, should be avoided to prevent orientation biases.
Backfilling: Filling voids in the sample holder with a low-absorbing material like silicon powder helps reduce orientation effects, enhancing scattering uniformity.
By following these best practices, powder XRD samples can yield reliable, reproducible data essential for material characterization.
Solid XRD Sample Preparation
Solid samples, such as bulk or crystalline materials, require unique preparation steps:
Sectioning: Cutting solid samples with precision tools, like diamond saws or lasers, produces smooth, defect-free surfaces for XRD.
Surface Polishing: Polishing surfaces with finer abrasives, like diamond paste, removes cutting artifacts that could affect XRD results.
Mounting: Securely mounting polished samples prevents stress and maintains surface quality, ensuring accurate XRD readings.
Surface Protection: Applying a protective coating, such as wax or a polymer film, prevents sample degradation or contamination, preserving surface quality.
Calibration and Validation: Regular calibration using certified materials ensures measurement precision, making it essential before each XRD analysis.
Adhering to these practices allows precise, accurate characterization of solid samples, reflecting their true crystal structure and properties.
Thin Film XRD Sample Preparation
Thin films require specialized preparation for accurate XRD analysis:
Substrate Cleaning: Thorough substrate cleaning using solvents (e.g., acetone) removes residues that could impact deposition or XRD.
Deposition: Selecting an appropriate thin film deposition method, such as PVD or CVD, and optimizing parameters ensure desired film quality and uniformity.
Thickness Measurement: Techniques like ellipsometry or profilometry measure thin film thickness accurately, which is crucial for interpreting XRD results.
Mounting and Handling: Careful handling and mounting, such as with vacuum chucks, prevent film damage and contamination.
Specialized Environments: Low-background holders or specific environment chambers can enhance thin film data, particularly for in situ analyses under varying conditions.
Following these guidelines enables precise thin film XRD characterization, providing insights into film structure and composition.
Troubleshooting Common XRD Sample Preparation Issues
Sample preparation errors can degrade XRD data quality. Here are common issues and solutions:
Sample Orientation: Unintentional preferred orientation can distort data. Using random powder mounts or spinner stages helps ensure crystal randomness.
Particle Size: Large particles cause diffraction peak broadening. Fine grinding to particle sizes below 10 microns improves data quality.
Preparation Method: Inappropriate methods introduce contaminants. Selecting preparation techniques suited to the material reduces contamination.
Sample Mounting: Uneven mounting leads to poor illumination. Ensuring a flat surface and secure sample mounting optimizes data reliability.
Background Fluorescence: Samples with fluorescent elements affect diffraction patterns. Using monochromators or specific detectors reduces interference.
By addressing these challenges, researchers can consistently prepare high-quality XRD samples and achieve dependable results.
Effective sample preparation is the foundation of accurate XRD data across different sample forms. Adhering to best practices tailored to specific sample types and addressing common preparation challenges ensures high-quality XRD analysis. With meticulous preparation, researchers can achieve meaningful insights into material structure and properties through XRD analysis.
Custom plush toys have transformed from simple children’s playthings into effective marketing tools across a wide range of industries. These adorable and soft creations are helping businesses forge emotional connections, boost brand loyalty, and increase engagement. As such, they’ve become a powerful way to make brands stand out in an increasingly competitive marketplace. This article delves into how businesses are creatively using custom plush toys to enhance their marketing efforts.
Common Applications of Custom Plush Toys
1. Children’s Toys and Gifts
Custom plush toys are most commonly associated with childhood. They are a staple in nurseries, playrooms, and gift stores, offering comfort and entertainment to children of all ages. Their soft texture, friendly designs, and the ability to be personalized make them an ideal choice for young children.
Example: Plush teddy bears, bunnies, or other animal-themed toys have been used for generations as birthday presents, baby shower gifts, or holiday stocking stuffers.
Traditional Appeal: Plush toys provide a sense of security and companionship to children. Their customizable nature allows parents and loved ones to create personalized gifts that hold sentimental value, making them keepsakes that last a lifetime.
2. Souvenirs and Collectibles
Custom plush toys have long been popular as souvenirs and collectibles. They are frequently sold at theme parks, tourist destinations, and gift shops, representing iconic landmarks, characters, or symbols of a location.
Example: Theme parks like Disneyland and Universal Studios sell plush versions of their beloved characters, allowing visitors to take home a piece of the magic as a souvenir.
Traditional Appeal: Plush toys make excellent memorabilia because they are both affordable and easily transportable. Whether depicting a local mascot, a famous landmark, or a well-known figure, these toys serve as cherished mementos of special trips and experiences.
3. Promotional Items for Businesses
For decades, businesses have used custom plush toys as promotional items to increase brand recognition and engage with customers. Plush toys can be branded with logos, slogans, or mascots and given away at events, in-store promotions, or as part of marketing campaigns.
Example: A bank might give away small custom plush toys in the shape of its mascot to children who open a savings account, fostering early brand loyalty.
Traditional Appeal: Plush toys are effective marketing tools because they offer a tangible, long-lasting reminder of a brand. The cute and appealing nature of plush toys helps create a positive association with the brand, especially for family-oriented businesses.
4. Charitable Donations and Causes
Charities and non-profit organizations have traditionally used custom plush toys as part of their fundraising efforts or charitable donations. Plush toys provide comfort to children and families in distress and serve as a symbol of care and support.
Example: Hospitals, shelters, and emergency response teams often distribute plush toys to children undergoing difficult experiences, such as medical treatments or traumatic events.
Traditional Appeal: Plush toys offer emotional comfort to those in need, making them an ideal item for charitable organizations. They help uplift the spirits of children in stressful situations and can be used as part of donation drives, where people contribute plush toys to those less fortunate.
5. Educational Tools and Storytelling
Custom plush toys have been used as educational tools in classrooms, libraries, and early childhood development centers. They can be designed to represent historical figures, animals, or fictional characters, helping to teach children in an engaging and interactive way.
Example: Teachers may use plush toys shaped like animals to teach students about wildlife or create puppet-style plush toys for storytelling in early education settings.
Traditional Appeal: Plush toys bring lessons to life, making learning fun and interactive. They are especially helpful for young children who learn best through play and visual aids. Teachers can use them for role-playing exercises, encouraging creativity and imagination in children.
6. Hospital Comfort Toys
Hospitals have traditionally used plush toys to bring comfort to pediatric patients. Custom plush toys are often given to children who are staying in hospitals for an extended period, providing them with a sense of familiarity and comfort during treatment.
Example: Many children’s hospitals have programs where each young patient receives a plush toy upon admission to help ease anxiety and create a more comforting environment.
Traditional Appeal: Hospital stays can be stressful for children, and plush toys offer a comforting, non-medical touch that helps distract and soothe patients. These toys often become treasured companions during a child’s recovery process, offering emotional support.
7. Wedding Favors and Special Occasions
Custom plush toys have been traditionally used as favors for special occasions, such as weddings, birthdays, and anniversaries. Plush toys personalized with names, dates, or themes can serve as unique, memorable keepsakes for guests.
Example: Couples may distribute small custom plush toys in the shape of hearts or animals as wedding favors, with tags that feature their names and wedding date.
Traditional Appeal: Plush toys make charming and sentimental gifts for guests at special events. Their customizable nature allows them to be tailored to match the theme or occasion, making them a creative alternative to more traditional favors.
Innovative uses of custom plush toys in marketing
1. Brand Mascot Plush Toys
One of the most popular uses of custom plush toys in marketing is the creation of custom brand mascots in plush form. Companies with a recognizable mascot or character can replicate it as a plush toy, turning it into a tangible representation of their brand that customers can hold and cherish.
Example: Fast food chains like McDonald’s and cereal brands like Kellogg’s have turned their iconic mascots, such as Ronald McDonald or Tony the Tiger, into plush toys. These toys help reinforce brand identity while serving as collectible items that customers want to own.
Marketing Impact: Creating a plush version of a mascot builds an emotional bond with customers, especially when they associate the mascot with positive experiences. It strengthens brand loyalty and generates organic word-of-mouth marketing as customers share their plush toys on social media.
2. Custom Plush Giveaways and Promotions
Plush toys are an effective promotional tool for events, giveaways, and product launches. Custom plush giveaways not only attract attention but also serve as long-lasting reminders of the brand, as recipients are likely to keep plush toys for a long time.
Example: During product launches or seasonal promotions, businesses can create limited-edition plush toys tied to a particular theme. For instance, a tech company might launch a plush toy resembling its latest gadget or logo, offering it as a gift with purchase.
Marketing Impact: Custom plush giveaways generate excitement and increase customer participation. Plush toys are also a great way to engage with families and children, making them ideal for brands that target younger demographics or those looking to foster a friendly, approachable image.
3. Crowdsourcing Ideas for Plush Toy Designs
Some brands involve their customers directly in the design process by crowdsourcing ideas for custom plush toys. This not only engages customers but also makes them feel like part of the brand’s creative journey. Crowdsourced plush designs can reflect customer preferences and allow companies to create products that resonate more deeply with their audience.
Example: Toy companies or entertainment brands can launch contests or campaigns encouraging customers to submit plush toy design ideas. The winning designs can then be turned into actual products, further strengthening customer engagement and satisfaction.
Marketing Impact: Crowdsourcing adds a personalized touch to marketing campaigns. It increases customer interaction and encourages user-generated content as people promote their submissions on social media. The final plush products become more meaningful to the community, fostering a stronger connection to the brand.
4. Charitable Campaigns with Custom Plush Toys
Custom plush toys are often used in charitable campaigns to raise awareness and funds for a cause. By creating limited-edition plush toys and donating proceeds to charity, businesses can show their commitment to social responsibility while building goodwill among their customers.
Example: Retailers and nonprofit organizations can collaborate on campaigns where a portion of plush toy sales goes to a specific charity. For example, a toy company might create a custom plush toy tied to a cause such as wildlife conservation, with a percentage of sales going to an environmental charity.
Marketing Impact: Charitable campaigns centered around plush toys resonate with customers who value brands that contribute to a good cause. These campaigns enhance brand image, build trust, and attract socially-conscious consumers who appreciate the brand’s philanthropic efforts.
5. Plush Toys as Social Media Marketing Tools
Plush toys are inherently photogenic and fun, making them ideal props for social media marketing campaigns. Businesses can use custom plush toys to create engaging content, encourage user-generated posts, or launch interactive contests that boost online visibility.
Example: Brands can encourage their followers to post pictures with their custom plush toys, using a specific hashtag. This not only increases engagement but also generates user-generated content that amplifies the brand’s reach on social platforms like Instagram and TikTok.
Marketing Impact: Plush toys appeal to a wide audience and have the potential to go viral, especially when tied to creative social media campaigns. By encouraging customers to share their plush toy experiences, businesses benefit from increased exposure and brand loyalty through organic content creation.
6. Plush Toys as Part of Loyalty Programs
Many companies use custom plush toys as rewards in loyalty programs. By offering exclusive plush toys that can only be obtained through points accumulation or customer loyalty, businesses encourage repeat purchases and long-term customer engagement.
Example: A coffee chain might offer a collectible plush toy series as part of its loyalty program, where customers can redeem points for a limited-edition plush figure that changes with each season or promotion.
Marketing Impact: Integrating plush toys into loyalty programs incentivizes repeat business, as customers are motivated to collect the full series or earn exclusive items. Plush toys also enhance brand recognition, especially when they are visually appealing and showcase the brand’s identity.
7. Collaborations and Co-Branding with Custom Plush Toys
Collaborations between brands and popular franchises can lead to co-branded custom plush toys that appeal to fans of both entities. This strategy expands the reach of both brands and creates a buzz around limited-edition products.
Example: A clothing brand could collaborate with a popular animated show to create custom plush toys featuring beloved characters. These co-branded toys can be sold as part of a special product line, appealing to both the show’s fanbase and the brand’s customer base.
Marketing Impact: Co-branded plush toys allow businesses to tap into new audiences and create hype around limited-edition products. The collaboration increases brand visibility and often leads to increased sales, as fans of both brands are eager to own a piece of the partnership.
Custom plush toys are a versatile and innovative marketing tool that can create lasting emotional connections with customers, enhance brand visibility, and increase customer engagement. Whether used in promotional campaigns, loyalty programs, or charitable efforts, custom plush toys have the power to turn marketing initiatives into memorable experiences. By leveraging the unique appeal of plush toys, businesses can differentiate themselves in the marketplace and build stronger relationships with their audience.
Marine searchlights play a critical role in ensuring the safety of maritime operations, especially during night voyages, poor weather conditions, and search-and-rescue missions. Integrating marine searchlights with navigation systems not only enhances visibility but also improves operational efficiency and safety. This article explores the process of integrating marine searchlights with navigation systems and the benefits of this integration for maritime operations.
Importance of Marine Searchlights in Navigation
Marine searchlights are essential for illuminating obstacles, hazards, and other vessels, enabling better decision-making during navigation. When paired with advanced navigation systems, these lights become more effective, allowing ship operators to focus on both situational awareness and precision navigation.
Key functions of marine searchlights include:
Illuminating Navigation Hazards: Searchlights help identify hazards such as icebergs, buoys, and floating debris.
Improving Vessel Maneuvering: In narrow or busy shipping lanes, searchlights provide visibility that helps with docking, turning, and avoiding collisions.
Search-and-Rescue Operations: Searchlights are essential in locating individuals or vessels in distress during rescue missions.
Night Navigation: Searchlights assist with safely navigating waters in low-light conditions or total darkness.
Steps to Integrate Marine Searchlights with Navigation Systems
Select Compatible Equipment The first step is choosing marine searchlights and navigation systems that are compatible with each other. Most modern searchlights come with built-in integration capabilities for digital navigation systems. Ensure that the equipment shares compatible interfaces, communication protocols (e.g., NMEA 2000), and supports automation features.
Digital Integration Support: Verify if the searchlight supports integration with digital control panels or navigation systems that use GPS or radar.
Control Interface: Searchlights may require specific control interfaces like joystick control, touchscreen panels, or linked integration through navigation system software.
Install and Wire the Searchlight System Proper installation of the searchlight is crucial for smooth integration with the vessel’s navigation system. This includes securely mounting the searchlight in a location that offers a wide range of motion, typically on the mast or bridge deck. It’s important to follow the manufacturer’s guidelines for installation and wiring to ensure compatibility.
Power Supply: Marine searchlights often run on the vessel’s DC power system. Ensure they are connected to a reliable power source with proper voltage.
Wiring for Control: Run control wires to the bridge, where the navigation system is located. Some searchlights use wireless or digital signal protocols, reducing the need for extensive wiring.
Connect the Searchlight to the Navigation System Once the searchlight is installed, connect it to the vessel’s navigation system. This step involves syncing the searchlight’s control unit with the navigation system’s control interface, whether through direct wiring, a network connection, or wireless communication. For vessels equipped with radar, GPS, or AIS, these systems can be linked to the searchlight for more precise control.
Communication Protocols: Use NMEA 2000 or other compatible communication standards to enable data exchange between the navigation system and the searchlight.
GPS/Radar Sync: By linking the searchlight with GPS and radar systems, operators can automatically adjust the light’s position based on the vessel’s heading and target location.
Calibrate and Test the System
Calibration is essential to ensure that the searchlight moves in tandem with the navigation system. Once connected, test the functionality of the searchlight by adjusting the beam direction, angle, and range through the navigation system’s control panel.
Movement Calibration: Ensure that the searchlight accurately follows the vessel’s heading and responds to changes in direction or movement initiated by the navigation system.
Adjust Beam Angle and Range: Test the light’s range and angle to verify it can cover necessary areas, including forward obstacles and potential hazards.
Integrate Automation Features
Many modern marine searchlights come equipped with automation features that can be integrated into the navigation system. For example, automated beam adjustment allows the searchlight to track specific objects detected by radar or GPS, improving operational efficiency.
Target Tracking: This feature allows the searchlight to lock onto and follow objects or hazards detected by radar or AIS, ensuring continuous illumination.
Preset Lighting Patterns: Automate certain lighting patterns based on navigation scenarios, such as docking, search-and-rescue operations, or night navigation.
Train Crew on System Use After integration, it is important to train the crew on how to use the marine searchlight through the navigation system. Familiarize the team with the controls, settings, and troubleshooting procedures to ensure they can fully utilize the integrated features during operations.
Control Navigation Interface: Teach operators how to adjust the searchlight using the vessel’s navigation software, including activating automated functions and manual overrides.
Emergency Protocols: Ensure the crew knows how to operate the searchlight manually if the navigation system fails or if emergency conditions require immediate response.
Benefits of Integrating Marine Searchlights with Navigation Systems
Enhanced Situational Awareness Integrating marine searchlights with navigation systems improves situational awareness by allowing operators to illuminate and monitor hazards in real time. The synchronized control ensures that searchlights focus on the vessel’s heading and areas of concern, improving overall visibility.
Improved Efficiency and Safety Automation features such as target tracking and beam adjustment enhance operational efficiency and safety, allowing for quicker responses to obstacles, other vessels, or search-and-rescue targets. By reducing manual intervention, the crew can focus on navigation and decision-making, improving safety at sea.
Seamless Operation Integration allows searchlights to be controlled through the same interface as radar, GPS, and communication systems, streamlining operations. This centralized control reduces the need for separate equipment handling and minimizes errors during critical operations.
Faster Search and Rescue Operations During search-and-rescue missions, synchronized control between navigation systems and searchlights can significantly reduce response times. By allowing the searchlight to automatically adjust to moving targets or specified search areas, rescuers can quickly locate individuals or vessels in distress.
Conclusion
Integrating marine searchlights with navigation systems offers significant benefits in terms of enhanced safety, efficiency, and operational effectiveness. Through careful selection, installation, and calibration, searchlights can be synchronized with navigation systems, improving visibility and decision-making during maritime operations. By taking advantage of automation features and centralized control, vessels can operate more safely and confidently, even in challenging conditions.
To ensure the safety of crew members, passengers, and cargo in maritime operations, life-saving equipment plays a critical role. Advances in technology have driven significant innovations in this area, enhancing the effectiveness, reliability, and accessibility of life-saving equipment. This article explores key technological advancements in maritime life-saving equipment, highlighting their impact on improving safety at sea.
Importance of Life-Saving Equipment in Maritime Operations
Maritime environments present numerous hazards such as unpredictable weather, mechanical failures, and collisions, making effective life-saving equipment essential for mitigating risks. Marine life-saving equipment serves several key purposes:
Ensures Crew and Passenger Safety: During emergencies, life-saving equipment provides immediate protection, ensuring the survival of individuals in dangerous conditions at sea.
Facilitates Quick Evacuation: Equipment such as lifeboats, life rafts, and marine evacuation systems enable rapid evacuation in critical situations, minimizing injury or loss of life.
Improves Chances of Rescue: GPS-equipped life jackets and personal locator beacons (PLBs) help rescue teams quickly locate individuals in distress, reducing search times.
Mitigates Maritime Hazards: Life-saving equipment protects against fires, capsizing, collisions, and severe weather.
Ensures Regulatory Compliance: International maritime laws require vessels to be equipped with life-saving equipment to enhance operational safety and reduce fatalities during emergencies.
Supports Operational Safety: Reliable life-saving equipment ensures maritime operations can continue with confidence, knowing safety measures are in place to handle emergencies effectively.
Technological innovations in life-saving equipment have transformed maritime safety, enabling quicker and more effective responses to emergencies, improving rescue operations, and reducing human error.
Latest Advancements in Life-Saving Equipment for Maritime Operations
Smart Life Jackets Traditional life jackets have evolved into smart life jackets equipped with GPS, automatic inflation systems, and distress signal transmitters, improving safety and rescue efforts.
Automatic Inflation: These life jackets automatically inflate upon water immersion, ensuring immediate buoyancy for incapacitated or unconscious individuals.
GPS Tracking: Integrated GPS allows rescue teams to track the location of individuals, reducing search times.
Integrated Lights and Signals: LED lights and emergency beacons enhance visibility, increasing the chances of rescue in low-light conditions.
Self-Righting Lifeboats
Traditional lifeboats are prone to capsizing in rough seas, while self-righting lifeboats are designed to return to an upright position if overturned, improving safety.
Self-Righting Mechanism: These lifeboats feature specific hull designs and weight distribution, ensuring they flip back upright in turbulent seas.
Improved Navigation Systems: Equipped with advanced navigation tools, including radar and GPS, these lifeboats can signal for help and navigate toward safety.
Marine Evacuation Systems (MES) Marine evacuation systems (MES) have revolutionized rapid evacuation in large vessels like cruise ships and ferries.
Inflatable Chutes and Rafts: MES deploys inflatable slides guiding passengers into life rafts, allowing rapid evacuation of hundreds of people.
Automated Deployment: These systems deploy automatically during emergencies, reducing response time and minimizing human error.
Compact Design: Modern MES systems are compact, taking up minimal space while providing maximum safety.
Personal Locator Beacons (PLBs) Personal locator beacons (PLBs) are portable devices that transmit distress signals via satellite to alert rescue authorities.
Satellite Connectivity: PLBs use satellite systems such as COSPAS-SARSAT, ensuring global coverage in remote areas.
Enhanced Battery Life: Improved battery life allows PLBs to send distress signals over extended periods, crucial during long rescue missions.
Waterproof and Impact-Resistant: Built to withstand harsh maritime conditions, PLBs remain functional in water and after impacts.
Drones for Search and Rescue Drones are increasingly used in maritime search and rescue operations due to their ability to quickly cover large areas.
Aerial Surveillance: Drones provide real-time aerial footage, speeding up search efforts.
Thermal Imaging: Drones with thermal imaging technology detect heat signatures, even in low-visibility conditions.
Delivery of Emergency Supplies: Some drones are designed to drop flotation devices, first-aid kits, and communication tools to people in distress.
Autonomous Rescue Boats Autonomous rescue boats, which operate without a crew, offer a new level of safety in dangerous or inaccessible areas.
Remote Control and AI Navigation: These boats are equipped with artificial intelligence and remote control systems, enabling them to navigate independently and avoid obstacles while searching for survivors.
Quick Deployment: Autonomous rescue boats can be launched quickly, reducing response times in emergencies.
Assistance in Hazardous Conditions: These vessels can operate in dangerous areas, such as during severe storms or near hazardous debris, where it would be unsafe for human rescuers.
Improved Fire Suppression Systems Fires aboard ships are one of the most dangerous maritime emergencies. Innovations in fire suppression systems have improved the ability to detect, contain, and extinguish fires on vessels.
Water Mist Systems: These systems use fine water sprays to cool flames and displace oxygen, effectively suppressing fires in confined spaces.
Fire Detection Sensors: Sensitive smoke and heat sensors trigger alarms and activate suppression systems before fires spread.
Automatic Fire Doors: Ships are now equipped with automatic fire doors that contain fire-prone areas, preventing the spread of flames and allowing safe evacuation.
Technological innovations in life-saving equipment are transforming maritime safety by enabling faster and more effective responses to emergencies. From smart life jackets to autonomous rescue boats, these advancements improve rescue efficiency, reduce human error, and ultimately save lives at sea.