Innovations in Oil and Gas Drilling Techniques: How Simulation Technology Contributing to the Advancments

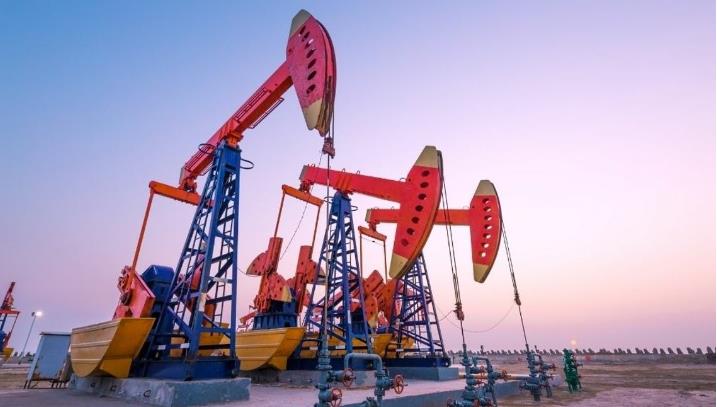
The oil and gas industry has been a cornerstone of global energy production for over a century, and advancements in drilling technology continue to shape its future. Innovations in drilling techniques have enabled the industry to access previously unreachable reservoirs, improve efficiency, reduce environmental impact, and increase safety.

drilling system - ocean and land

Key Advancments in Drilling Techniques for the Oil and Gas Industry

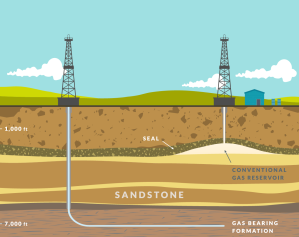
1. Directional and Horizontal Drilling

What It Is: Directional drilling allows for drilling at various angles, enabling multiple wells to be drilled from a single location. Horizontal drilling is a form of directional drilling in which the wellbore turns horizontally within the reservoir.

Advantages:

Maximizes contact with oil- or gas-bearing formations, enhancing extraction.

Reduces surface footprint by enabling multiple wells from a single pad.

Increases the ability to extract hydrocarbons from challenging, unconventional reservoirs, such as shale formations.

Applications: Horizontal drilling has been essential in the success of shale gas and oil extraction, particularly in regions like the United States, which experienced a shale boom due to this innovation.

2. Managed Pressure Drilling (MPD)

What It Is: MPD is a technology that allows precise control over wellbore pressure, enabling operators to manage the pressure gradient effectively and respond to downhole conditions in real time.

Advantages:

Reduces the risks of blowouts, wellbore instability, and lost circulation.

Enhances safety and efficiency, especially in high-pressure, high-temperature (HPHT) environments.

Enables access to challenging reservoirs with narrow pressure margins.

Applications: MPD is widely used in deepwater and offshore drilling, where conventional pressure control methods are insufficient for complex and high-risk environments.

3. Extended Reach Drilling (ERD)

What It Is: ERD is a method of drilling wells with exceptionally long horizontal reach, allowing operators to tap into reservoirs located several kilometers away from the drill site.

Advantages:

Minimizes environmental impact by reducing the need for additional surface facilities.

Allows operators to access remote resources from land-based drilling pads or existing offshore platforms.

Provides cost savings by reducing the need for new infrastructure.

Applications: ERD is beneficial in offshore drilling, where rigs are strategically placed to reach distant, economically viable deposits while reducing the environmental footprint.

4. Rotary Steerable Systems (RSS)

What It Is: RSS is a system that enables precise directional control of the drill bit without stopping the rotation of the drill string, allowing for faster, more accurate drilling.

Advantages:

Provides greater control over the drilling trajectory, resulting in improved accuracy.

Increases the rate of penetration and reduces overall drilling time.

Reduces wear on equipment, extending the operational life of tools and drill bits.

Applications: RSS is widely used in complex well paths, such as those with multiple changes in direction, making it essential for drilling in unconventional reservoirs and tight formations.

5. Automated Drilling and Data-Driven Operations

What It Is: Automated drilling involves using advanced algorithms, real-time data, and machine learning to optimize drilling processes with minimal human intervention.

Advantages:

Increases efficiency by reducing downtime and optimizing drilling parameters.

Enhances safety by minimizing human exposure to hazardous drilling conditions.

Provides operators with real-time insights and predictive analytics for better decision-making.

Applications: Automation is applied in both onshore and offshore drilling operations, where real-time data is essential for continuous optimization, predictive maintenance, and identifying potential hazards.

6. Top Drive Drilling Technology

What It Is: Top drive systems replace traditional rotary tables, providing power and torque directly to the drill string, allowing for continuous rotation.

Advantages:

Increases drilling speed and efficiency by enabling continuous drilling without making connections.

Reduces wear and tear on the drill string and associated equipment.

Improves safety by reducing the need for manual handling of heavy equipment.

Applications: Top drive technology is widely used in both onshore and offshore drilling, particularly in deep wells where traditional rotary tables would face limitations.

Top Drive Drilling equipment

7. Underbalanced Drilling (UBD)

What It Is: UBD is a technique where the pressure in the wellbore is intentionally kept lower than the formation pressure, allowing hydrocarbons to flow to the surface as drilling continues.

Advantages:

Minimizes formation damage, which can occur when drilling fluids invade the reservoir.

Reduces the risk of lost circulation, as fluid pressure is lower than the surrounding formation pressure.

Increases production rates and extends the productive life of the well.

Applications: UBD is effective in depleted reservoirs, mature fields, and formations where traditional drilling methods would reduce the reservoir’s productivity.

8. Dual Gradient Drilling (DGD)

What It Is: DGD is a type of drilling that uses two different drilling fluids or gradients to manage pressure more accurately, which is particularly beneficial in deepwater environments.

Advantages:

Helps maintain well control in challenging deepwater formations where conventional drilling gradients are insufficient.

Reduces the risk of blowouts by accurately balancing formation pressures.

Enhances safety and efficiency in ultra-deepwater drilling.

Applications: DGD is especially valuable in ultra-deepwater offshore projects where pressure control is critical, as it allows operators to balance formation pressures without excessive casing and cementing.

How Simulation Technology Contributes to the Innovations in Drilling Techniques

1. Enhanced Training and Skill Development

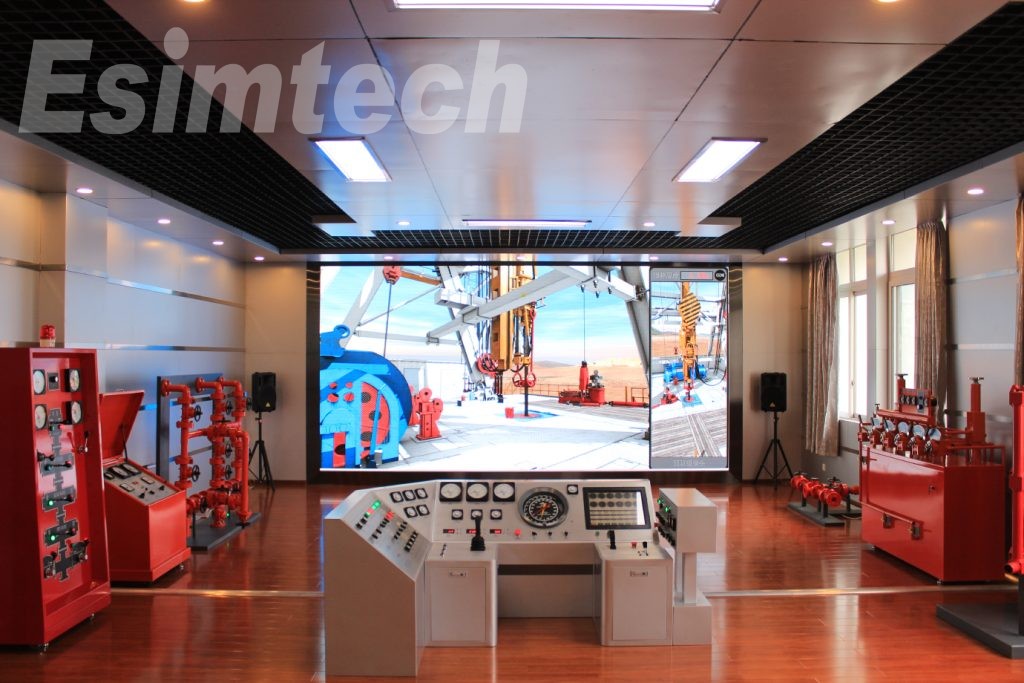
Realistic Drilling Environments: Simulation-based drilling training system allows operators to practice in highly realistic environments that mimic complex drilling scenarios, from routine operations to rare, high-risk situations.

Risk-Free Learning: Trainees can experience the impacts of their decisions in a virtual setting, building proficiency without the high costs or safety risks associated with real-life mistakes.

Continuous Learning: With advancements in simulation fidelity, trainees can stay updated on new techniques and technologies, ensuring they remain competent in the latest innovations like rotary steerable systems (RSS) and managed pressure drilling (MPD).

drilling and well control simulation system

2. Optimizing Well Path and Trajectory Planning

Pre-Drilling Analysis: Simulations help engineers design the optimal well path, predicting subsurface conditions to navigate complex reservoirs effectively.

Collision Avoidance: In fields with multiple wells, simulation helps map out trajectories to prevent collisions, especially critical in directional and extended reach drilling operations.

Real-Time Adjustments: Simulations allow for real-time analysis of drilling conditionss, helping drillers make informed decisions on-the-fly, such as changes in trajectory or alterations in drilling parameters.

3. Managed Pressure and Underbalanced Drilling Simulations

Pressure Management: By simulating well pressure dynamics, operators can perfect their approach to MPD and underbalanced drilling (UBD) techniques. This reduces the likelihood of costly blowouts, formation damage, or lost circulation events.

Downhole Conditions Modeling: Advanced simulations allow for accurate modeling of downhole conditions, giving engineers the insights they need to control wellbore pressures more effectively and safely.

Optimized Fluid Selection: Simulations can test various fluid properties under different pressures and temperatures, guiding the selection of the best drilling fluid for complex environments.

4. Improving Efficiency and Rate of Penetration (ROP)

Data-Driven Optimization: Simulation tools use historical and real-time data to analyze optimal drilling parameters, such as rotation speed, weight on bit, and hydraulic power, improving ROP and reducing drilling time.

Reducing Downtime: Predictive maintenance simulations analyze wear and tear on drill bits and other equipment, helping to minimize unexpected downtime by planning maintenance and replacements in advance.

RSS and Top Drive Optimization: Simulation enables engineers to test different configurations and drilling parameters for RSS and top drive systems, refining settings that achieve the highest ROP and tool lifespan.

5. Predictive Analysis for Drilling Safety and Hazard Prevention

Blowout Prevention: With high-fidelity simulations, engineers can model extreme pressure conditions and test blowout preventer (BOP) responses, allowing drillers to design BOP stacks that will withstand specific well pressures.

Kick Detection and Response: Simulations model potential “kick” scenarios, enabling crews to develop a quick, practiced response to prevent kicks from escalating into blowouts.

Real-Time Hazard Monitoring: By integrating simulation models with real-time data, drillers can identify hazards like gas pockets or unstable formations before they cause safety issues.

6. Enhanced Offshore Drilling Capabilities

Dynamic Positioning Systems: Simulation tools for offshore rigs model environmental forces, such as ocean currents and wind, allowing for fine-tuning of dynamic positioning systems that keep rigs stable and precisely located.

Dual Gradient Drilling (DGD) Optimization: Offshore simulations assess pressure gradients and fluid properties to fine-tune DGD techniques, which help manage pressures in ultra-deepwater projects, reducing blowout risk.

Virtual Rig Design: Before offshore rigs are even deployed, simulation technology is used to model their interactions with seabed formations and pressure gradients, allowing engineers to design the best rig configuration for a given location.

7. Cost Reduction through Virtual Testing and Planning

Reduced Field Testing: Simulation reduces the need for expensive field tests by allowing engineers to virtually test various drilling scenarios and tools, cutting down on unnecessary costs.

Virtual Equipment Prototyping: New equipment designs, such as rotary steerable systems or specialized drill bits, can be virtually prototyped, reducing time and costs associated with physical prototypes.

Supply Chain Efficiency: Simulation-driven planning helps optimize supply chain and logistics by predicting equipment and material needs more accurately, minimizing delays and resource wastage.

8. Automated and Digital Drilling

Machine Learning and Predictive Analytics: Simulations are integrated with machine learning algorithms that analyze drilling data in real time, adjusting parameters automatically to enhance performance.

Digital Twins: By creating a “digital twin” of a drilling operation, operators can monitor a live model that reacts to real-time changes, allowing immediate adjustments and improvements based on simulation-predicted outcomes.

Remote Operations: Remote drilling operations are made possible through simulations that model field conditions, enabling remote teams to control and optimize drilling activities from centralized locations.

In summary, the advancements in drilling techniques for oil and gas have brought about a new era of efficiency, safety, and environmental responsibility. Simulation technology is central to driving innovation in oil and gas drilling, creating pathways to safer, more efficient, and environmentally responsible operations. As the industry faces the challenges of increasing energy demand, unconventional reservoirs, and stricter environmental regulations, these innovations will play a key role in its continued evolution and sustainability.

A Step-by-step Guide to Cleaning Stuffed Animals Effectively

Stuffed animals hold a special place in our hearts, whether as cherished childhood memories or comforting collectibles. However, with time, these cuddly companions can accumulate dirt, dust, and even allergens. Properly cleaning a stuffed animal is essential to maintaining its softness, appearance, and longevity. This guide will walk you through the best practices for cleaning stuffed animals safely and effectively.

custom plush animal supplier

1. Check the Care Label

Most stuffed animals come with care labels that include specific cleaning instructions. Look for labels with indications like “machine washable” or “surface clean only” to ensure you use the appropriate cleaning method.

Following the recommendations of the stuffed animal manufacturer the is key to preserving the toy’s fabric, stuffing, and any unique features like sewn-on eyes, sequins, or other delicate decorations.

2. Surface Cleaning for Delicate or Non-Machine Washable Stuffed Animals

For stuffed animals that are delicate, have electronic components, or are labeled “surface clean only,” follow these steps:

Supplies Needed: Mild detergent, a small sponge or cloth, and a clean towel.

Steps:

Mix a small amount of mild detergent with water to create a gentle soapy solution.

Dampen the sponge or cloth, then gently blot and wipe the dirty areas on the stuffed animal.

Once cleaned, use a damp cloth with plain water to remove any soap residue.

Blot with a dry towel to remove excess moisture and allow the stuffed animal to air dry.

3. Machine Washing Sturdy Stuffed Animals

If the care label indicates that machine washing is safe, here’s how to wash your stuffed animal without damaging it:

Supplies Needed: Mesh laundry bag or pillowcase, mild laundry detergent, and a washing machine.

Steps:

Place the stuffed animal inside a mesh laundry bag or pillowcase to protect it from direct agitation during the wash cycle.

Use a mild, fragrance-free detergent to avoid irritating the toy’s fabric or causing allergic reactions.

Set the washing machine to a gentle cycle with cold water. Hot water can shrink or damage some stuffed animals, so cold is generally safest.

Once the cycle is complete, remove the stuffed animal and reshape it if necessary.

cleaning stuffed animals

4. Drying the Stuffed Animal

Proper drying is essential to keep your stuffed animal looking its best:

Air Drying: The safest way to dry a stuffed animal is to air dry it. Place the toy on a clean, dry towel in a well-ventilated area, ideally with indirect sunlight to speed up drying. Flip and fluff the toy periodically to help it dry evenly.

Drying in a Machine: If the care label permits, place the stuffed animal in a dryer set to low or no heat. Add a few clean towels to the dryer to cushion and protect the toy during the cycle. Use a short, gentle cycle to avoid damaging delicate fibers.

Avoid Excessive Heat: High heat can damage the stuffing, fabric, or any plastic parts, so it’s best to keep drying temperatures low.

How to Clean Stuffed Animals: A Step-by-Step Guide

Stuffed animals hold a special place in our hearts, whether as cherished childhood memories or comforting collectibles. However, with time, these cuddly companions can accumulate dirt, dust, and even allergens. Properly cleaning a stuffed animal is essential to maintaining its softness, appearance, and longevity. This guide will walk you through the best practices for cleaning stuffed animals safely and effectively.

1. Check the Care Label

Most stuffed animals come with care labels that include specific cleaning instructions. Look for labels with indications like “machine washable” or “surface clean only” to ensure you use the appropriate cleaning method.

Following the manufacturer’s recommendations is key to preserving the toy’s fabric, stuffing, and any unique features like sewn-on eyes, sequins, or other delicate decorations.

2. Surface Cleaning for Delicate or Non-Machine Washable Stuffed Animals

For stuffed animals that are delicate, have electronic components, or are labeled “surface clean only,” follow these steps:

Supplies Needed: Mild detergent, a small sponge or cloth, and a clean towel.

Steps:

Mix a small amount of mild detergent with water to create a gentle soapy solution.

Dampen the sponge or cloth, then gently blot and wipe the dirty areas on the stuffed animal.

Once cleaned, use a damp cloth with plain water to remove any soap residue.

Blot with a dry towel to remove excess moisture and allow the stuffed animal to air dry.

3. Machine Washing Sturdy Stuffed Animals

If the care label indicates that machine washing is safe, here’s how to wash your stuffed animal without damaging it:

Supplies Needed: Mesh laundry bag or pillowcase, mild laundry detergent, and a washing machine.

Steps:

Place the stuffed animal inside a mesh laundry bag or pillowcase to protect it from direct agitation during the wash cycle.

Use a mild, fragrance-free detergent to avoid irritating the toy’s fabric or causing allergic reactions.

Set the washing machine to a gentle cycle with cold water. Hot water can shrink or damage some stuffed animals, so cold is generally safest.

Once the cycle is complete, remove the stuffed animal and reshape it if necessary.

4. Drying the Stuffed Animal

Proper drying is essential to keep your stuffed animal looking its best:

Air Drying: The safest way to dry a stuffed animal is to air dry it. Place the toy on a clean, dry towel in a well-ventilated area, ideally with indirect sunlight to speed up drying. Flip and fluff the toy periodically to help it dry evenly.

Drying in a Machine: If the care label permits, place the stuffed animal in a dryer set to low or no heat. Add a few clean towels to the dryer to cushion and protect the toy during the cycle. Use a short, gentle cycle to avoid damaging delicate fibers.

Avoid Excessive Heat: High heat can damage the stuffing, fabric, or any plastic parts, so it’s best to keep drying temperatures low.

5. Removing Odors

Over time, stuffed animals can absorb odors from their surroundings. Here’s a simple way to freshen them up:

Supplies Needed: Baking soda and a plastic bag.

Steps:

Place the stuffed animal in a plastic bag and sprinkle it with a generous amount of baking soda.

Seal the bag and shake gently so the baking soda covers the entire surface of the stuffed animal.

Let it sit for about 30 minutes to an hour, allowing the baking soda to absorb any odors.

Remove the stuffed animal and shake or brush off the baking soda residue.

6. Disinfecting Stuffed Animals

If you need to sanitize a stuffed animal due to illness or allergies, use these gentle disinfecting techniques:

Natural Sunlight: Place the stuffed animal in indirect sunlight for a few hours to help kill bacteria naturally.

Steam Cleaning: Use a handheld steam cleaner on a low setting to gently sanitize the toy. Be cautious not to over-saturate it with steam, as this can damage the stuffing.

Fabric Spray Sanitizer: Lightly mist the stuffed animal with a fabric-safe sanitizer or antibacterial spray. Allow it to dry fully before use.

7. Brushing and Fluffing

After washing and drying, some stuffed animals may need a little grooming to restore their original look:

Use a Soft Brush: For stuffed animals with fur, use a soft-bristle brush to fluff up the fibers and restore their appearance.

Re-Fluff the Filling: Gently squeeze and massage the toy to redistribute the stuffing and restore its shape.

Additional Tips

Spot Test First: Always spot test any cleaning product on a small, inconspicuous area of the stuffed animal to ensure it won’t discolor or damage the fabric.

Regular Maintenance: Lightly vacuum or brush your stuffed animals periodically to remove dust and reduce the frequency of deep cleaning.

Store Properly: Store stuffed animals in a cool, dry place when not in use to protect them from moisture, dust, and direct sunlight.

By following these steps, you can effectively clean, sanitize, and maintain your stuffed animals without compromising their quality or sentimental value.

Implementer specializes in creating customized, hypoallergenic, and easy-to-clean stuffed animals perfect for any brand, event, or personal need. Using premium, safe materials and meticulous craftsmanship, Implementer ensures each plush is not only unique but also designed for easy maintenance and long-lasting quality.

customization service for plush toys

What are the Key Factors Affecting the Affordability of Marine Life-saving Equipment

Ensuring safety on the water is essential for all maritime operators, from small boat owners to large shipping companies. The affordability of life-saving equipment is a critical concern, especially as advanced technology and materials become integral to modern maritime safety solutions. This article explores the factors affecting the affordability of key marine life-saving equipment, including lifeboats, personal flotation devices (PFDs), emergency position-indicating radio beacons (EPIRBs), and more, and examines ways to make these live-saving tools more accessible for various marine operation.

life raft

1. Lifeboats and Liferafts

Lifeboats and liferafts are fundamental to marine safety, providing a secure means of evacuation if a vessel becomes compromised. While mandatory for commercial vessels, they represent a significant investment. Several factors impact their affordability:

Construction Materials: Marine lifeboats are commonly made of durable, corrosion-resistant materials like fiberglass or reinforced steel, which increase their cost. However, manufacturers are exploring lighter composite materials that may reduce production costs without sacrificing durability.

Design and Features: Basic lifeboats are more affordable, but models with additional safety features like automated launching systems and self-righting capabilities can be costly. Affordable options can often be achieved by focusing on essential safety features rather than premium add-ons.

Manufacturing Innovations: Streamlining production techniques, such as modular design and 3D printing, is beginning to make lifeboats and liferafts more affordable. By standardizing certain design elements, manufacturers can reduce costs and pass these savings to the end user.

inflatable resue boat

2. Personal Flotation Devices (PFDs)

PFDs, commonly known as lifejackets, are vital for every individual aboard a vessel, offering buoyancy and protection in emergencies. Advances in materials and design have made PFDs more effective, but affordability remains a priority.

Bulk Manufacturing: Due to high demand, many PFDs are manufactured in large quantities, which lowers the per-unit cost. Standard models with basic buoyancy functions are more affordable than advanced models with additional features, such as automatic inflation or thermal protection.

Regulatory Compliance: PFDs must meet safety standards set by international maritime organizations, which can add to their cost. However, manufacturers are developing compliant yet cost-effective materials that meet safety requirements without significantly raising prices.

Reusable Designs: Some PFDs now include reusable features, such as replaceable CO2 cartridges in inflatable models, which makes them more affordable over time as they reduce the need for frequent replacements.

3. Emergency Position-Indicating Radio Beacons (EPIRBs)

EPIRBs are critical in emergency situations, as they transmit distress signals to rescue authorities, helping to locate the vessel. Though EPIRBs were traditionally quite expensive, recent advances have improved affordability.

Miniaturization and Efficiency: Technological advancements have enabled manufacturers to create smaller, more efficient EPIRBs, which reduces the materials cost and overall price.

Extended Battery Life: Modern EPIRBs have long-lasting batteries, reducing the need for replacements and lowering lifetime ownership costs. Solar-powered options are also emerging, which can further reduce maintenance costs.

Subsidies and Financial Support: Some maritime safety organizations provide subsidies for EPIRBs, making them more accessible for smaller operators or individual boat owners. Additionally, governments in high-risk maritime regions often support EPIRB affordability programs to enhance overall maritime safety.

4. Fire Suppression Systems

Fire hazards pose a serious threat to vessels, making fire suppression systems essential. However, the price of these systems can be high due to their complexity.

Standardized Systems: Many manufacturers now produce standardized, scalable systems that fit a variety of vessel sizes and types, making fire suppression technology more affordable and accessible.

Affordable Refills and Maintenance: Fire suppression systems with easy-to-refill extinguishing agents and straightforward maintenance schedules reduce ongoing costs, making them more affordable over time.

Component Advancements: Improvements in materials and chemical agents for fire suppression systems have led to smaller, less complex systems that are still highly effective, allowing them to be priced lower without compromising safety.

5. First Aid and Medical Kits

No vessel should be without a first aid kit, yet these can be costly, especially for larger vessels that require more comprehensive kits.

Modular Kits: Many companies now offer modular first aid kits, allowing operators to purchase essential components and add on as needed, making it easier to invest in safety without a high upfront cost.

Bulk Purchase Options: For larger operators, bulk purchasing of standardized kits can significantly reduce costs, making it possible to equip multiple vessels affordably.

Making Life-Saving Equipment More Affordable: Industry and Policy Innovations

Ensuring that all vessels can access marine life-saving equipment regardless of budget is a key focus within the maritime industry. Some initiatives and approaches include:

Subsidies and Grants: Various organizations offer subsidies and grants to make life-saving equipment more affordable, especially for small businesses and individuals in high-risk areas.

Bulk and Cooperative Purchasing: Maritime cooperatives and industry groups often negotiate bulk purchasing agreements that reduce costs for members.

Buyback Programs: Some manufacturers and governments have implemented buyback programs for older safety equipment, enabling operators to trade in for newer, more affordable options.

marine life jacket

Ovarall, the affordability of marine life-saving equipment is crucial to maritime safety. As technology advances and production methods improve, essential equipment like lifeboats, PFDs, EPIRBs, fire suppression systems, and medical kits are becoming more accessible. By focusing on affordability alongside effectiveness, manufacturers, policymakers, and maritime organizations can help ensure that vessels of all sizes and purposes are prepared for emergencies, enhancing overall safety across the industry.

Key Aspects You Should Know about Explosion-proof Flood Lights

Flood lights are essential in various industries for their high-intensity lighting, which is ideal for illuminating large areas. However, in environments where flammable gases, dust, or vapors are present, conventional flood lights pose a serious risk of explosion. This is where explosion-proof flood lights become crucial. Designed specifically for hazardous locations, these lights prevent ignition of the surrounding atmosphere, ensuring safety in settings like chemical plants, oil refineries, and mining operations. This article explores the principles behind explosion-proof flood lights, how they work, and why they are indispensable in certain high-risk environments.

CFT6 explosion-proof flood light

Understanding Explosion-Proof Technology

The term “explosion-proof” refers to a lighting design that can safely contain any internal explosion, preventing the flames or hot gases from escaping and igniting the external hazardous environment. This classification, regulated by international safety standards like the ATEX (Atmosphères Explosibles) in Europe and the NEC (National Electrical Code) in the United States, indicates that the light is suitable for use in explosive atmospheres.

The Principle of Explosion-proof Flood Lights

Explosion-proof flood lights work based on containment and control mechanisms designed to prevent external ignition, including the following key principles:

Robust Enclosures: The fixtures are encased in sturdy, gas-tight housings, usually made from high-grade metals like aluminum or stainless steel. These enclosures prevent any sparks or arcs from escaping the housing, so even if there’s an internal fault, the external atmosphere remains safe.

Temperature Control: Explosion-proof flood lights are designed to operate at lower temperatures to minimize the risk of igniting flammable gases or dust. Heat dissipation mechanisms, including heat sinks and venting designs, ensure that the temperature remains controlled.

Specialized Seals and Gaskets: To prevent any escape of hot gases or flames, explosion-proof flood lights are equipped with high-grade seals and gaskets, ensuring airtight protection. These seals maintain a robust barrier between the internal components and the surrounding environment.

Intrinsically Safe Components: Components like ballasts, drivers, and switches are carefully chosen or designed to prevent overheating or sparking. Intrinsic safety measures reduce the energy output of certain components to levels below what is required to ignite gases.

CFT6 explosion-proof flood light

How Explosion-Proof Flood Lights Work

Explosion-proof flood lights function by following these design principles, supported by additional features that enhance safety and efficiency in hazardous environments:

Encapsulation of Potential Ignition Sources: Every component inside an explosion-proof flood light, from electrical circuits to wiring, is enclosed in an anti-spark or spark-reducing structure. The design ensures that even if a fault occurs, any resulting sparks or arcs are contained within the fixture.

Minimized Heat Generation: Explosion-proof LED flood lights, in particular, are preferred in hazardous locations because they generate significantly less heat compared to traditional lighting technologies. LEDs work at lower temperatures and offer a long operational life, reducing the need for frequent maintenance in dangerous areas.

Pressure Resistance: The enclosures of explosion-proof lights are rigorously tested for pressure resistance. They can withstand and contain minor explosions within the fixture, thus preventing external ignition. This containment capability is critical to maintaining safety in explosive atmospheres.

Applications of Explosion-Proof Flood Lights

Explosion-proof flood lights are indispensable in various high-risk settings. Here are some common applications:

Oil and Gas Industry: In environments where volatile gases and vapors are present, explosion-proof flood lights provide essential illumination for both indoor and outdoor operations, ensuring worker safety.

Chemical Plants: Explosion-proof lighting prevents the accidental ignition of chemical fumes, allowing safe working conditions in facilities where toxic or flammable substances are processed or stored.

Mining: Underground mining activities release flammable gases, making explosion-proof lighting critical for reducing risks of accidents caused by electrical faults.

Food and Grain Processing: Dust in these environments can be highly combustible. Explosion-proof flood lights help prevent dust explosions, which can occur from a simple spark.

Advantages of Explosion-Proof Flood Lights

The advantages of explosion-proof flood lights extend beyond just safety:

Longer Lifespan: Explosion-proof flood lights, particularly LEDs, are engineered for durability, resulting in a longer lifespan and reduced maintenance needs.

Energy Efficiency: Most explosion-proof flood lights use LED technology, which consumes less power, translating to cost savings for industries operating in hazardous environments.

Enhanced Safety: By mitigating the risk of accidental explosions, these lights protect workers, equipment, and facilities, making them an investment in operational safety.

CFD13 LED Explosion-proof Flood Light Supplier

Standards and Certifications

Explosion-proof lights must meet stringent regulatory standards before they are installed in hazardous environments. Some key standards include:

ATEX Directive: This European standard defines the requirements for equipment intended for explosive atmospheres, including specific classifications for different types of hazardous locations.

IECEx Certification: The IECEx (International Electrotechnical Commission Explosive) system is another globally recognized certification for equipment used in explosive environments.

UL and NEC Codes: In the United States, the National Electrical Code (NEC) provides classifications for hazardous locations, while UL (Underwriters Laboratories) certifies that lighting fixtures meet explosion-proof requirements.

In summary, explosion-proof flood lights are an essential safety measure in industries where flammable materials are handled. By employing robust enclosures, heat control, specialized seals, and intrinsically safe components, these lights mitigate the risk of explosions in hazardous areas. Adherence to standards like ATEX and UL ensures that explosion-proof lights perform reliably under extreme conditions, providing both safety and efficiency for workers and operations. Through technological advancements, explosion-proof lighting continues to evolve, offering better illumination, durability, and safety in some of the most challenging environments worldwide.

A Step-by-step Guide to Installing and Uninstalling Hollow Rivets Safely

Hollow rivets are versatile fasteners commonly used in light metal, leather, fabric, and plastic applications. They provide a secure connection while being relatively easy to install and uninstall, making them popular in manufacturing, leatherworking, and repair industries. Safe installation and removal are crucial to avoid damaging the materials and to ensure proper function of the rivets. Here is a step-by-step guide on how to install and uninstall hollow rivets safely.

brass hollow rivet manufacturer

Tools and Materials Needed

To install and uninstall hollow rivets, gather the following tools and equipment:

For Installation:

Hollow rivets (appropriate size and type for the material)

Rivet setter or rivet gun

Drill or hole punch (if necessary for creating pilot holes)

Hammer (if using manual tools)

Backing material or support board

For Uninstallation:

Drill with a bit matching the rivet diameter

Flathead screwdriver

Punch tool or small chisel

Eye and hand protection (for both installation and uninstallation)

Installation of Hollow Rivets

Step 1: Prepare the Material

Before installing hollow rivets, ensure that the materials to be joined are clean, aligned, and prepared for fastening. For some materials, a pilot hole might be needed to avoid stress or tearing.

Step 2: Mark the Rivet Points

Using a ruler or guide, mark the exact points where you plan to place the rivets to ensure even spacing and alignment. This is particularly important for aesthetic projects or structural connections, where misalignment could compromise the overall strength.

Step 3: Create Pilot Holes

If necessary, create holes slightly smaller than the rivet diameter to avoid loosening the rivet over time. For fabric, a sharp awl or hole punch can be used, while for metals or other rigid materials, a drill with a small bit should work.

Step 4: Insert the Rivet

Push the hollow rivet through the holes so that the head sits flush against the material. Depending on the rivet type, it may have a flanged or capped side that adds stability to the connection.

Step 5: Secure the Rivet with a Rivet Setter

Place the rivet setter tool over the protruding part of the hollow rivet and apply pressure by either squeezing the rivet setter handle (if using a rivet gun) or tapping it lightly with a hammer. The rivet should begin to compress and secure the materials together. Check the rivet’s placement and alignment to make sure it is secure and properly seated.

Safety Tip: When using a hammer or manual tools, keep your hands clear of the impact area, and wear gloves to avoid accidental injuries.

brass hollow rivets

Uninstallation of Hollow Rivets

Removing hollow rivets requires more precision to prevent damaging the surrounding material. Here’s how to safely uninstall them:

Step 1: Assess the Rivet Type and Condition

Before uninstallation, determine whether the rivet has deformed or flanged ends that need special attention. Inspect the rivet to ensure that your removal method won’t compromise the surrounding material.

Step 2: Drill Out the Rivet

Using a drill with a bit that matches the rivet’s diameter, slowly drill into the center of the hollow rivet. Keep the drill steady to avoid slipping and damaging the material. Drill only deep enough to release the flanged end without drilling completely through the material.

Safety Tip: Always wear eye protection when drilling rivets, as small metal shards can be dangerous. Avoid excessive force, which can overheat and weaken the drill bit or damage the material.

Step 3: Remove the Rivet with a Punch Tool

After drilling the head, use a small punch tool or flathead screwdriver to push out the remainder of the rivet. Gently tap the punch tool until the rivet loosens and can be removed completely. If the rivet does not loosen, try drilling a little further or using a chisel to cut through any remaining flange.

Step 4: Inspect the Material

After removing the rivet, inspect the material for any damage. If necessary, smooth the edges of the hole with sandpaper or a small file to prevent rough edges from affecting the new rivet installation.

Additional Safety Considerations

Wear Protective Equipment: Always use gloves and safety goggles when installing or removing rivets to prevent injuries from sharp edges or metal fragments.

Work in a Stable Environment: Place your work material on a flat, stable surface, preferably with a rubber mat underneath, to avoid slipping and improve control.

Use the Right Tools: Using tools like a rivet setter or a drill with an appropriately sized bit can prevent the risk of material damage or accidental injury. Avoid makeshift tools, as they can make the job less precise and more dangerous.

Dispose of Removed Rivets Properly: Hollow rivets, once removed, may have sharp edges. Collect them carefully and dispose of them to prevent accidental injuries or harm to the environment.

Common Mistakes to Avoid

Over-drilling: Drilling too deeply or with too much pressure can enlarge the material’s holes and prevent a secure new installation.

Using Incorrect Rivet Sizes: Ensure the rivet diameter matches the materials to avoid loose fits or material strain.

Forgetting to Check Rivet Condition: Check hollow rivets for cracks or bending before installing them, as compromised rivets can fail under pressure.

Overall, installing and uninstalling hollow rivets requires the right tools, technique, and safety precautions to maintain the integrity of the material. By following these steps and exercising care, you can securely join and separate materials without causing unnecessary damage or compromising safety.

Why Use Vertical Autoclaves for Reliable Sterilization While Optimizing Lab Space

Efficient space utilization is a critical factor in modern laboratories, particularly those located in urban areas or within shared research facilities where space is limited. Vertical autoclaves, designed to occupy a smaller footprint than their horizontal counterparts, offer a practical solution for sterilization without compromising functionality or sterilization capacity. This article delves into how vertical autoclaves can optimize lab space while providing reliable sterilization for various laboratory applications.

DW-B series Vertical autoclaves

Understanding Vertical Autoclaves

Vertical autoclaves, often referred to as top-loading autoclaves, are designed with a compact, upright structure that takes advantage of vertical space. Unlike traditional horizontal autoclaves, these systems open from the top, allowing users to load items directly from above. Vertical autoclaves are commonly used in laboratories for sterilizing glassware, laboratory instruments, media, and waste materials.

Benefits of Vertical Autoclaves in Laboratory Settings

The vertical design provides a range of benefits, especially for laboratories dealing with space constraints:

Space Optimization: Vertical autoclaves take up minimal floor space, allowing labs to allocate more room for essential equipment or workstations. Their compact design is ideal for narrow lab layouts and is suitable for facilities aiming to maximize floor area without compromising equipment functionality.

High Sterilization Efficiency in Limited Space: Despite their smaller footprint, vertical autoclaves are capable of handling a substantial volume of materials per cycle. These autoclaves are typically available in various chamber sizes, allowing labs to choose models that meet their sterilization needs while keeping spatial requirements minimal.

Ease of Access: The top-loading design of vertical autoclaves allows for quick and easy loading and unloading of items. This feature is especially beneficial for labs with high-throughput requirements, as it enables efficient handling of equipment and samples during sterilization.

vertical autoclave

Key Features of Vertical Autoclaves

Vertical autoclaves come with a range of features that enhance their performance and convenience, including:

Digital Controls and Programmable Cycles: Most modern vertical autoclaves feature digital controls that allow users to program cycles for different sterilization requirements, providing flexibility and precision in managing sterilization processes. Programmable cycles also enhance productivity by enabling users to set specific temperatures and times for various applications.

Safety Features: Many vertical autoclaves are equipped with advanced safety mechanisms, including pressure and temperature monitoring, automatic door locks during cycles, and alarms for cycle completion or abnormalities. These safety features minimize the risk of user error and ensure that the sterilization process is both effective and safe.

Energy Efficiency: The compact design of vertical autoclaves often results in lower energy consumption. Many models come with insulation that reduces heat loss, contributing to overall energy savings. This feature is beneficial for labs aiming to maintain sustainable practices.

Applications of Vertical Autoclaves in Different Laboratory Environments

Vertical autoclaves are versatile and are commonly found in various laboratory settings, including:

Microbiology and Biomedical Labs: Used for sterilizing culture media, laboratory tools, and waste materials, vertical autoclaves play a crucial role in preventing contamination. Their space-saving design is particularly useful in crowded microbiology labs, where bench space is valuable.

Pharmaceutical and Biotech Industries: In pharmaceutical and biotech research, vertical autoclaves sterilize equipment and materials to ensure compliance with strict hygiene standards. Their ability to sterilize large loads efficiently makes them ideal for these high-stakes environments.

Academic and Research Institutions: Vertical autoclaves are widely used in academic labs where multiple research projects run simultaneously. Their compact design and ease of use make them ideal for institutions with limited budgets and space.

Factors to Consider When Choosing a Vertical Autoclave

When selecting a vertical autoclave for a lab, several factors should be considered to ensure optimal performance and durability:

Capacity Requirements: It’s essential to evaluate the volume and types of items that will be sterilized regularly. Choosing the appropriate chamber size helps in managing sterilization loads efficiently.

Temperature and Pressure Settings: Different laboratory applications may require varying sterilization conditions. Vertical autoclaves with adjustable temperature and pressure settings offer the flexibility needed to handle diverse laboratory tasks.

Automation and Control Features: Advanced control features, including programmable cycles and digital displays, make it easier for users to manage complex sterilization schedules, thus enhancing workflow efficiency.

Compliance with Laboratory Standards: It is crucial to select an autoclave model that meets the specific regulatory standards applicable to the laboratory’s field, such as ISO, FDA, or GMP requirements.

vertical autoclaves

Maintenance and Durability of Vertical Autoclaves

To maximize the lifespan of a vertical autoclave and ensure consistent performance, regular maintenance is essential. Periodic inspection of seals, pressure valves, and temperature sensors can help prevent breakdowns. Many manufacturers offer service packages, which are recommended to keep the autoclave in peak condition and ensure it continues to meet regulatory standards.

Overall, vertical autoclaves provide an efficient and practical solution for laboratories seeking to optimize space while maintaining high sterilization standards. Their compact design, energy efficiency, and versatility make them a valuable asset across various laboratory settings, from research institutions to industrial facilities. By investing in a vertical autoclave, labs can enhance workflow, increase productivity, and make the most of limited space—all while ensuring effective sterilization and compliance with rigorous laboratory standards.

Detailed Explanation of Image Processing Techniques Used for Print Quality Inspection

Print quality inspection plays a crucial role in industries where accurate, high-quality prints are essential, such as in packaging, textiles, and electronics. Image processing techniques help automate the inspection process, ensuring that defects are quickly identified and corrected, which minimizes waste, increases consistency, and maintains brand reputation. Here, we explore key image processing techniques used for print quality inspection, highlighting their applications and benefits.

printing quality inspection system

1. Pattern Recognition

Pattern recognition algorithms are designed to identify predefined shapes, logos, text, or symbols in a print sample. By comparing scanned images to a predefined reference pattern, these algorithms can detect any inconsistencies or deviations from the original design.

Applications: Ensuring brand logos and trademarks are consistently printed without deformation or errors.

Benefits: Reduces human error, ensuring brand elements appear consistently across products.

2. Optical Character Recognition (OCR)

OCR technology is used to detect and interpret printed text, enabling systems to compare it to the intended text. This is particularly important in industries where exact text reproduction is critical, such as pharmaceutical packaging and labels in consumer products.

Applications: Verification of printed text on packaging, labels, and product codes.

Benefits: Increases accuracy in text inspection, ensuring correct information is presented to consumers and regulatory requirements are met.

3. Color Analysis

Color consistency is essential in print quality, as variations can affect brand integrity and customer perception. Color analysis techniques involve scanning and comparing color tones within a print sample to a reference standard to detect any deviation in hue, saturation, or brightness.

Applications: Ensuring color accuracy in packaging, branding materials, and textile prints.

Benefits: Maintains color consistency across batches, enhancing brand presentation and quality assurance.

4. Edge Detection

Edge detection algorithms identify the boundaries of elements in an image, allowing the system to evaluate print alignment, sharpness, and integrity. By analyzing edges, this technique can detect blurriness or misalignments in prints, ensuring clean and sharp images.

Applications: Used in text and graphic alignment, especially where sharp outlines are crucial.

Benefits: Helps identify blurring, misalignment, and ensures clear print boundaries.

5. Blob Analysis

Blob analysis is used to detect irregularities in shapes or patterns, identifying areas that deviate from expected dimensions or shapes. This technique is helpful for identifying defects such as smudges, spots, or incomplete print areas.

Applications: Detection of spots, smudges, and misprints in labels, packaging, and graphical elements.

Benefits: Helps in early detection of irregularities, reducing defective output and minimizing waste.

6. Image Registration

Image registration involves aligning two or more images to a common coordinate system. This technique allows for comparison between a reference image and the sample under inspection, enabling the detection of even minor deviations.

Applications: Useful in overlay comparisons in multilayer prints or printed circuit boards (PCBs).

Benefits: Detects small deviations with high accuracy, ensuring uniformity in complex layered prints.

7. Fourier Transform Analysis

Fourier transform is used to analyze spatial frequency information in an image. It is particularly effective for identifying periodic defects, such as banding or streaking, which are common in printing processes.

Applications: Detection of banding, streaks, or other periodic defects in printing.

Benefits: Identifies subtle periodic patterns that may not be visible in the spatial domain, enhancing print quality inspection accuracy.

8. Defect Classification

Machine learning and artificial intelligence (AI) techniques are increasingly used to classify and predict defects of printed issues based on image data. Defect classification models are trained on large datasets to identify a wide range of print issues, from minor inconsistencies to significant defects.

Printing flaw

Applications: Used across various industries for a comprehensive defect classification, from minor ink spots to significant misalignments.

Benefits: Increases inspection accuracy, reduces manual intervention, and enables rapid sorting and identification of defective prints.

9. Contrast Enhancement

Contrast enhancement techniques adjust the contrast of an image to make defects or irregularities more visible, helping inspection systems detect subtle differences in print quality. These techniques adjust image contrast automatically, emphasizing areas with potential defects.

Applications: Enhances inspection for subtle defects in text and graphic printing.

Benefits: Improves detection of faint print inconsistencies, increasing overall inspection accuracy.

10. Histogram Analysis

Histogram analysis involves examining the intensity distribution of pixels in an image, helping to evaluate overall brightness and contrast levels. This is especially useful in assessing uniformity in print areas, identifying areas that may be too dark or too light compared to the intended design.

Applications: Consistency checking for uniform backgrounds or solid color fields in packaging and print materials.

Benefits: Ensures consistent brightness and contrast, maintaining uniform print quality across batches.

To sum up, the integration of these image processing techniques into print quality inspection systems has revolutionized the printing industry, enhancing accuracy and efficiency. From pattern recognition and OCR to advanced AI-driven defect classification, each method offers unique advantages, reducing waste, and increasing consistency in print quality. As industries continue to innovate, these techniques will likely become more sophisticated, leading to even higher standards in print quality and customer satisfaction.

How to Promote Sustainability in Custom Plush Products

In recent years, the custom plush industry has begun embracing sustainability, responding to a growing demand from consumers who prioritize environmentally responsible products. As plush toys and collectibles grow in popularity, manufacturers are exploring sustainable practices that balance quality and design with a lower environmental footprint. Here’s a look at how the industry is innovating to promote sustainability in custom plush products.

Custom Plush Manufacturing Details

1. Eco-Friendly Materials

Recycled and Organic Fabrics: Many custom plush manufacturers are opting for materials like recycled polyester, organic cotton, and bamboo. Recycled polyester, made from reclaimed plastic bottles, reduces waste and lowers demand for virgin materials. Organic cotton, grown without pesticides or synthetic fertilizers, decreases harmful environmental impacts.

Plant-Based Fillers: Sustainable fillings made from biodegradable or plant-based fibers like corn fiber and kapok offer alternatives to traditional polyester fillings. These eco-friendly fillers provide the plush feel without relying on petroleum-based products, and they break down more easily when the toy reaches the end of its lifecycle.

Non-Toxic Dyes: Natural, water-based, or non-toxic dyes ensure that no harmful chemicals are released into the environment during the dyeing process, making the plush toy safer for both the planet and end users.

2. Energy-Efficient Manufacturing

Renewable Energy Sources: By switching to renewable energy sources like solar or wind power, factories can significantly reduce their carbon footprint. Many plush manufacturers are investing in renewable energy solutions, cutting back on fossil fuel dependency and embracing cleaner production practices.

Efficient Machinery and Processes: Updated machinery and energy-efficient processes used in custom plush manufacturing techniques , reduce waste and lower emissions. This approach not only helps meet eco-friendly standards but also supports a more streamlined production flow, ultimately reducing costs for manufacturers.

3. Waste Reduction and Recycling

Scrap Recycling Programs: Production often generates scrap materials, but innovative companies are finding ways to recycle or reuse these scraps. By repurposing them into new products, manufacturers can minimize waste and improve resource efficiency.

Packaging Reduction: Sustainable plush companies are also reducing the volume of plastic and non-recyclable materials used in packaging. Some companies have adopted minimalist designs, using recycled or biodegradable materials to package and ship plush toys. Compact, eco-friendly packaging reduces waste and often cuts shipping costs, too.

4. Certifications and Eco-Labels

Global Organic Textile Standard (GOTS): GOTS certification ensures that products labeled as organic meet stringent environmental and social criteria, from raw material harvesting through environmentally and socially responsible manufacturing. Plush toys with GOTS certification assure consumers that they meet high sustainability standards.

Forest Stewardship Council (FSC) Certified Packaging: The FSC certification guarantees that paper and wood products are sourced responsibly, helping preserve natural forests. FSC-certified packaging ensures that the materials used come from well-managed forests, promoting biodiversity and responsible forestry practices.

5. Ethical Labor Practices

Fair Wages and Safe Working Conditions: Sustainable practices also encompass ethical labor standards. Ensuring fair wages and safe working conditions helps support workers and fosters a responsible supply chain.

Transparent Supply Chains: Many companies are now adopting transparent supply chains, allowing consumers to understand the origins and environmental impact of their plush toys. This transparency builds trust with consumers, who can be confident that the products align with their values.

6. Product Longevity and Reusability

Durability and Quality: Sustainable plush toys are often designed with longevity in mind. High-quality materials and construction techniques ensure that the toy remains in good condition over time, reducing the likelihood of it ending up in a landfill.

Repair and Reuse Programs: Some companies encourage customers to send back damaged plush toys for repair, promoting reuse rather than disposal. Repair programs extend the lifecycle of products, which is a core aspect of sustainable consumption.

7. Consumer Education and Engagement

Encouraging Sustainable Disposal: Plush companies are increasingly providing information on how to responsibly dispose of or recycle toys at the end of their life. Educating consumers on proper disposal methods supports circularity and reduces waste.

Sustainable Branding and Messaging: Many brands are also engaging customers with eco-conscious messaging, raising awareness about the environmental impacts of plush toys and the benefits of sustainable practices. This education helps build a community of environmentally-aware consumers.

custom plush supplier

The Future of Sustainability in Custom Plush

With these advancements, the custom plush manufacturing is making great strides toward sustainability. By implementing eco-friendly materials, energy-efficient manufacturing, waste reduction practices, and ethical labor standards, the industry is reducing its environmental footprint and responding to consumer demand for more sustainable, responsible products. As the focus on environmental responsibility continues to grow, the custom plush sector will likely see even more innovation in design, materials, and production processes.

Ultimately, embracing sustainability in custom plush is about more than reducing environmental impact—it’s about creating products that consumers can feel good about. By championing these eco-friendly practices, the custom plush industry not only helps the planet but also strengthens the brand loyalty and satisfaction of increasingly conscientious consumers.

Different Drilling Methods in the Oil and Gas Industry: A Comparative Analysis

The oil and gas industry utilizes various drilling techniques, each suited for specific conditions, resource locations, and operational objectives. A comparative analysis of drilling methods highlights the advantages, limitations, and ideal applications of each. Understanding these methods can help stakeholders select the most appropriate approach based on factors such as efficiency, cost, safety, and environmental considerations.

Drilling Techniques

1. Conventional Vertical Drilling

Overview:

Conventional vertical drilling is the traditional approach, where the well is drilled straight down from the surface to reach an oil or gas reservoir. This method is straightforward, cost-effective, and widely used in regions where reservoirs are directly below the drilling site.

Advantages:

Lower Cost: Vertical drilling is often less expensive due to its simplicity, lower equipment requirements, and reduced complexity.

Simplicity and Speed: Fewer moving parts and shorter drill paths allow for faster drilling and completion.

Ease of Maintenance: Equipment and well maintenance are generally less complex, making it a preferred option in remote areas.

Limitations:

Limited Reservoir Access: Vertical wells are effective only in reservoirs that lie directly beneath the drill site, making them unsuitable for larger or unconventional reservoirs.

Lower Recovery Rates: Compared to advanced methods, vertical wells typically access less of the reservoir, resulting in potentially lower yields.

Environmental Impact: Multiple vertical wells are often required to cover an area, increasing land disturbance.

Ideal Applications:

Shallow or directly accessible reservoirs, smaller oil fields, and wells with low environmental restrictions are ideal for vertical drilling.

2. Directional Drilling

Overview:

Directional drilling enables operators to drill at various angles, allowing for multiple well paths to diverge from a single drill site. This approach is widely adopted for accessing resources spread across a broader area or where geological formations make vertical access impractical.

Advantages:

Increased Reservoir Contact: By adjusting the angle, operators can target multiple points within a reservoir, significantly increasing recovery rates.

Environmental Benefits: A single well pad can support multiple deviated wells, minimizing the environmental footprint.

Cost-Effective Multi-Well Pads: Drilling multiple wells from one location reduces costs associated with site preparation and surface equipment.

Limitations:

Higher Initial Costs: The equipment and technology for directional drilling are more costly than conventional vertical drilling.

Complex Operations: The additional engineering and planning required increase operational complexity and demand skilled personnel.

Ideal Applications:

Directional drilling is ideal for offshore and onshore reservoirs where the resource extends horizontally or where regulatory and environmental considerations limit the number of well pads.

3. Horizontal Drilling

Overview:

Horizontal drilling is an extension of directional drilling where the well is first drilled vertically and then gradually turned horizontally to maximize contact with the oil or gas reservoir. Horizontal wells are critical in the development of unconventional resources, such as shale and tight gas formations.

horizontal oil drilling

Advantages:

Enhanced Resource Recovery: Horizontal wells maximize reservoir exposure, significantly increasing production, especially in low-permeability reservoirs.

Efficient Resource Drainage: Horizontal wells can effectively drain large areas of a reservoir, reducing the need for multiple wells.

Compatibility with Hydraulic Fracturing: Horizontal drilling works well in conjunction with hydraulic fracturing to release resources in tight formations.

Limitations:

Higher Drilling Costs: Horizontal drilling requires advanced equipment and specialized techniques, increasing initial expenses.

Complex Well Design: Complex engineering and planning are required, as well as experienced drillers, which may limit its applicability in certain regions.

Ideal Applications:

Horizontal drilling is particularly suited to unconventional plays, including shale gas, shale oil, and coalbed methane, where maximizing contact with the resource layer is essential for economic viability.

4. Rotary Steerable Drilling (RSS)

Overview:

Rotary steerable drilling systems allow for precise steering of the drill bit without interrupting the drilling process. Unlike traditional steerable systems, RSS maintains continuous rotation of the drill string, improving drilling efficiency and allowing for highly accurate well placement.

Advantages:

Enhanced Accuracy and Control: RSS provides real-time directional adjustments, which are essential for complex or extended-reach wells.

Improved Drilling Speed: Continuous rotation prevents the need to stop and adjust, leading to faster drilling and lower costs.

Ideal for Extended-Reach Drilling (ERD): RSS technology makes it feasible to drill longer wells with fewer deviations, maximizing reservoir exposure.

Limitations:

High Equipment and Operational Costs: RSS systems are among the most expensive due to the technology and real-time monitoring required.

Requirement for Skilled Operators: Operating RSS requires specialized skills and training, which can limit its application where such personnel are unavailable.

Ideal Applications:

RSS is ideal for deepwater offshore drilling, extended-reach drilling, and wells with complex geological formations, where precision and control are crucial.

Technological Advancements in Drilling Methods

The drilling industry is experiencing transformative changes with advancements in technology, making drilling safer, more efficient, and capable of reaching previously inaccessible resources. Here’s a look at some of the front-line innovations:

Automation and Robotics

Automation and robotics are replacing labor-intensive tasks in drilling, enhancing both safety and efficiency. Robotic arms can perform precise tasks at the borehole without fatigue, reducing human error and allowing for continuous operation. Think of it as having a tireless assistant performing delicate maneuvers in high-risk environments, ensuring reliability and reducing downtime.

Data Analytics and Real-Time Monitoring

Real-time data analytics and monitoring systems are revolutionizing the decision-making process. Sensors and advanced software continuously track the health and stability of the wellbore, acting as a vigilant, subterranean doctor that instantly identifies issues and recommends adjustments. This data-driven approach minimizes costly mistakes, increases efficiency, and helps operators maintain optimal drilling conditions at all times.

Advanced Drilling Fluids

Nano-engineered drilling fluids are redefining wellbore stability, cooling, and lubrication capabilities. These high-performance fluids are designed to perform under extreme conditions, enabling access to deeper and more challenging formations. Imagine these fluids as a “magic potion” that boosts drilling efficiency, stability, and safety in some of the harshest environments.

Artificial Intelligence (AI)

AI algorithms are making drilling operations smarter by predicting potential issues, recommending ideal techniques, and autonomously adjusting drilling parameters for optimal performance. Picture a drilling mastermind that anticipates and solves problems before they arise, ensuring safer and more efficient operations by continuously learning from past data to improve future outcomes.

Drilling Simulation

Drilling simulation technology offers a risk-free platform to train personnel and analyze various scenarios. These simulations provide realistic, immersive environments for drillers to practice and refine their skills, allowing them to tackle complex scenarios with confidence.

Land Rig Installation Simulator

To sum up, each drilling method in the oil and gas industry has distinct advantages and limitations, making it essential to choose the most appropriate one based on the specific characteristics of the reservoir, operational goals, and budgetary constraints. Vertical drilling remains a practical choice for shallow and easily accessible reservoirs, while directional and horizontal drilling expand the range of accessible resources and improve yield in larger fields. Rotary steerable drilling offers unmatched control and efficiency, especially for complex or deepwater projects. By selecting the best-suited drilling technique, operators can maximize productivity, reduce costs, and achieve higher environmental stewardship.

Why Choosing Double-Deck Design in Marine Navigation Lights

Marine navigation lights are essential safety components on vessels, used to signal position, direction, and type of operation to other boats. The development of a double-deck design in marine navigation lights marks a significant advancement, aiming to improve both functionality and durability in these critical components. This article explores the benefits, engineering principles, and applications of double-deck design in marine navigation lights.

double-deck marine navigation lights

The Purpose and Importance of Marine Navigation Lights

Marine navigation lights help ensure safe passage, particularly in low-visibility conditions such as nighttime, fog, or storms. These lights vary in color, placement, and operational patterns to indicate a vessel’s size, position, and movement. As a vital part of maritime safety, marine navigation lights are regulated by international standards like the International Regulations for Preventing Collisions at Sea (COLREGs).

Introduction to Double-Deck Design in Marine Navigation Lights

Double-deck marine navigation lights feature a dual-tiered structure, with two separate light chambers (or decks) within a single housing unit. Each deck typically serves a specific function, such as displaying different colors or intensities, allowing for increased flexibility in signaling.

Key Elements of Double-Deck Design:

Two-tiered Light Chambers: Each deck operates independently, allowing the same fixture to emit distinct lights or patterns from each chamber.

Increased Lighting Surface: Doubling the lighting area enhances visibility, making signals more noticeable over greater distances.

Durability and Redundancy: A double-deck design provides redundancy, where if one chamber fails, the other remains operational, increasing safety.

LED Double-deck Navigation Light

Advantages of Double-Deck Design in Marine Navigation Lights

The double-deck design offers several advantages that improve visibility, safety, and operational efficiency:

1. Enhanced Visibility

The dual-chamber design allows for a larger light-emitting area, making the lights brighter and more easily seen from afar.

Improved visibility aids in faster recognition of a vessel’s position and direction by other vessels, reducing the likelihood of collisions, especially in crowded or busy maritime areas.

2. Redundant Safety Mechanism

By incorporating two independent light sources, the double-deck design creates a fail-safe system. If one deck malfunctions, the second can still operate, preventing total light failure.

This redundancy is particularly valuable for vessels operating in remote or challenging environments, where maintenance opportunities may be limited.

3. Operational Versatility

Double-deck lights can accommodate different lighting configurations, allowing for greater versatility. For instance, one deck can emit a steady light while the other flashes, or each deck may be a different color, such as green and red, for port and starboard lights.

This adaptability is ideal for vessels with varying operational requirements or those navigating diverse waterways.

4. Improved Durability and Weather Resistance

Double-deck marine navigation lights are typically designed with enhanced structural integrity to withstand harsh maritime environments. The sealed dual-chamber structure minimizes exposure to moisture, salt, and impact, reducing wear and tear.

The robust construction of double-deck lights makes them highly resilient against environmental factors, ensuring longevity and consistent performance.

5. Technical Aspects of Double-Deck Marine Navigation Lights

The engineering of double-deck navigation lights incorporates specialized materials, optics, and power management to ensure efficiency and reliability.

Materials and Sealing Technology

Double-deck lights are often crafted from marine-grade materials like stainless steel and polycarbonate, offering superior corrosion resistance.

Advanced sealing techniques prevent water ingress and withstand high-pressure cleaning or wave impact, essential for enduring marine conditions.

Optical Design and LED Technology

LEDs are the preferred light source in double-deck navigation lights, providing higher brightness, lower energy consumption, and longer life than traditional bulbs.

Optical lenses are strategically placed in each deck to maximize light dispersion, making signals more conspicuous in a range of visibility conditions.

Power Efficiency and Backup

Double-deck designs often include low-power LED systems that draw minimal energy, essential for vessels relying on limited battery or solar power.

Many models incorporate backup power solutions, like solar charging or batteries, to ensure continuous light output during prolonged operations.

5. Applications of Double-Deck Marine Navigation Lights

Double-deck navigation lights are particularly beneficial for a variety of maritime applications:

1. Commercial Shipping

Larger vessels require enhanced lighting to ensure visibility across vast distances. Double-deck lights provide a reliable solution for commercial shipping vessels that operate continuously, often through the night and in harsh conditions.

2. Offshore Oil and Gas Platforms

Double-deck lights are valuable for marking boundaries and providing clear signals in oil and gas operations. The redundancy in lighting ensures that platforms remain visible to passing vessels, reducing the risk of collisions.

3. Recreational and Fishing Boats

Smaller vessels, including recreational boats and fishing vessels, benefit from the compact yet powerful design of double-deck lights. These lights provide increased visibility without requiring significant power, making them ideal for smaller energy systems.

4. Maritime Search and Rescue Operations

Double-deck lights provide reliable, highly visible signals for search and rescue operations, even in challenging weather conditions. The dual-chamber design can signal distress effectively, helping rescuers locate vessels quickly.

LCXH-102PL LED Double-deck Navigation Signal Light

Future Trends in Double-Deck Marine Navigation Lights

Innovation in double-deck navigation lights continues, with promising trends emerging:

IoT-Connected Lights: Integrating IoT capabilities into double-deck lights enables remote monitoring and control, allowing operators to detect malfunctions and manage light settings in real-time.

Solar Integration: Solar-powered double-deck lights are becoming increasingly common, providing sustainable energy options that reduce reliance on the vessel’s power systems.

Advanced Optics for Increased Range: Enhanced optics and lens technology are being developed to further increase the visible range of double-deck lights, making signals clearer at extended distances.

In summary, the double-deck design in marine navigation lights represents a significant advancement in maritime safety and signaling. By enhancing visibility, providing operational redundancy, and offering flexible lighting configurations, double-deck lights cater to the diverse needs of vessels across commercial, recreational, and industrial maritime sectors. As technology continues to evolve, double-deck lights will likely become a staple in modern navigation systems, ensuring that vessels remain visible and safe in all maritime conditions.

通过 WordPress.com 设计一个这样的站点
从这里开始